
How to Build a Membership Site on WordPress
In this tutorial, we’ll introduce the tools you’ll need to create a membership site on WordPress, and show you how to set them up. 🪂 Let’s dive right in!
📚 Table of contents:
Step 1: Get WordPress and web hosting 💻️
While WordPress is a free Content Management System (CMS), you’ll need to purchase website hosting and a domain name before you can create a membership site on WordPress. Fortunately, many web hosts offer affordable starter plans, sometimes for less than $5 per month.
Additionally, many hosting providers, such as Bluehost, automatically install WordPress for you. This means you can start creating your website straight away, with no setup involved.
Your hosting plan will likely include a free domain. If not, find a relevant one from a domain registrar for $10 to $20 per year.
Step 2: Install the Members and Profile Builder plugins 🔌
There are two primary tools we’ll be using for this tutorial, and both have free and premium versions. First up, Members (by MemberPress) is a plugin that enables you to add a “member” role to your website and assign specific capabilities to that role. This is essential for creating a membership site on WordPress, as you’ll need to control which content members can access and which actions they can perform.
The second plugin, Profile Builder, lets you create login and registration forms for your members. You can also use it to enable profile editing. This allows members to change their personal details in their accounts.
The free versions of these plugins are enough to set up a basic membership site. However, if you want to create multiple membership levels and registration forms or add payment methods so you can sell content, you’ll want to check out the premium versions.
To get started, visit your WordPress dashboard and navigate to Plugins → Add New Plugin. Look for “Members” by MemberPress.
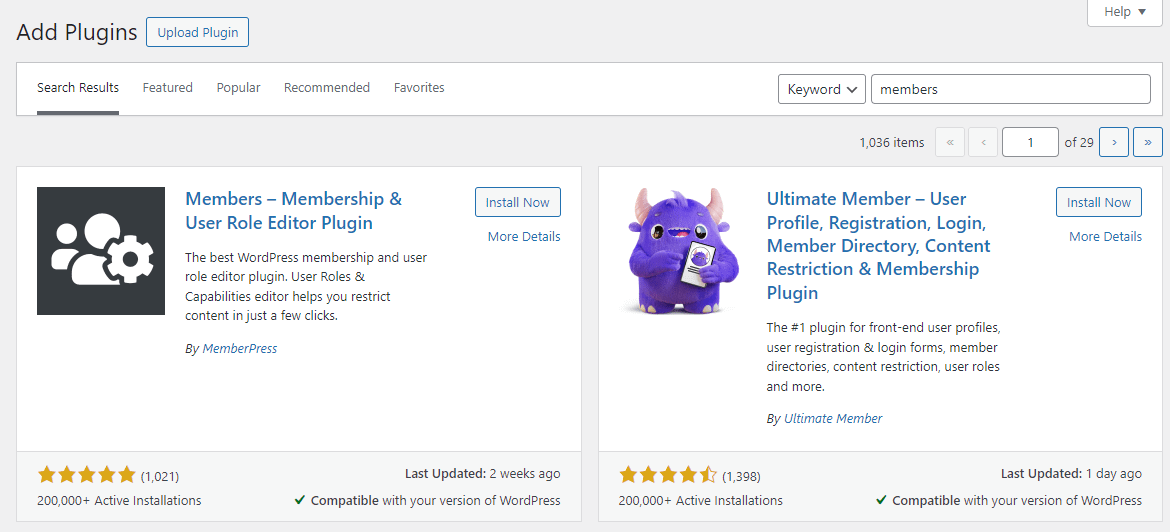
Click on Install Now, followed by Activate. Once you’ve activated the plugin, you should see a new item in your dashboard menu, labeled Members.
Then install Profile Builder by Cozmoslabs, following the same process.
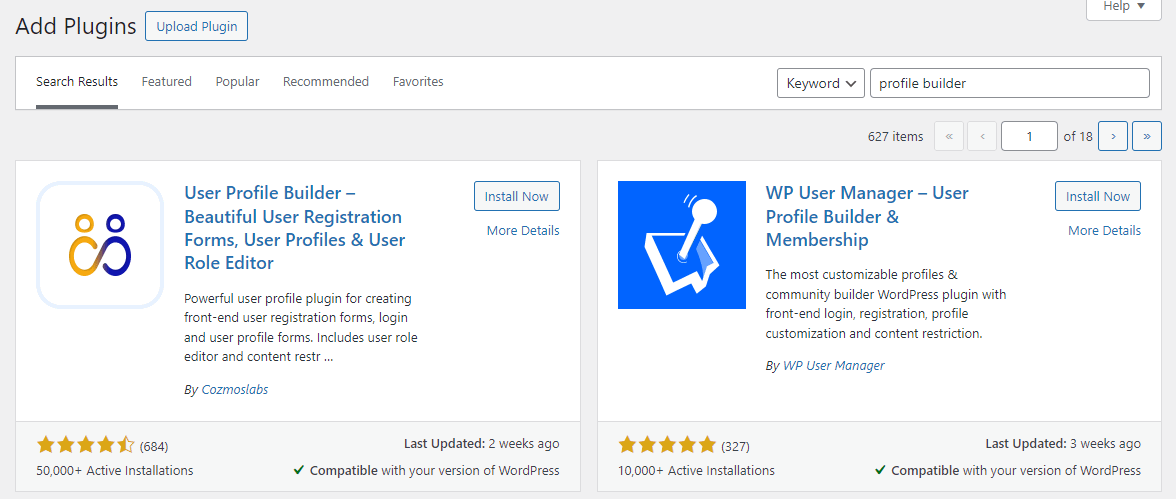
Next, you’ll see the Profile Builder setup wizard. There, you’ll see that the plugin has automatically created a few pages on your site, including the “Login” and “Registration” pages for your members.
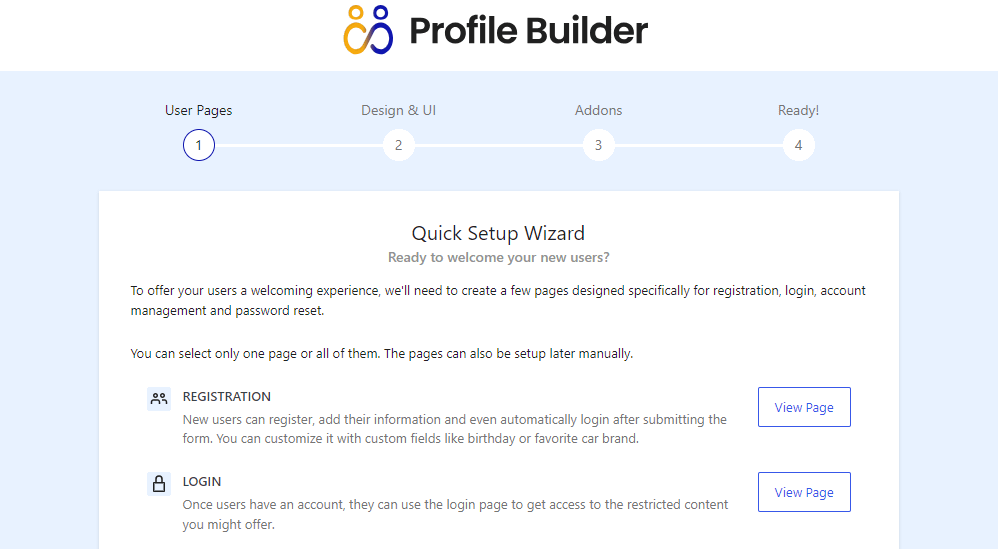
Skip the setup process for now. We’ll show you how to configure the plugin’s settings in a later step.
Step 3: Create a new role 🧑💻
Now that you’ve installed the plugins you’ll need, you can start building your membership site on WordPress. First, you’ll want to create a role for members. You’ll be using the Members plugin for this.
In your WordPress dashboard, go to Members → Add New Role. Call this new role “Member,” or whatever you prefer.
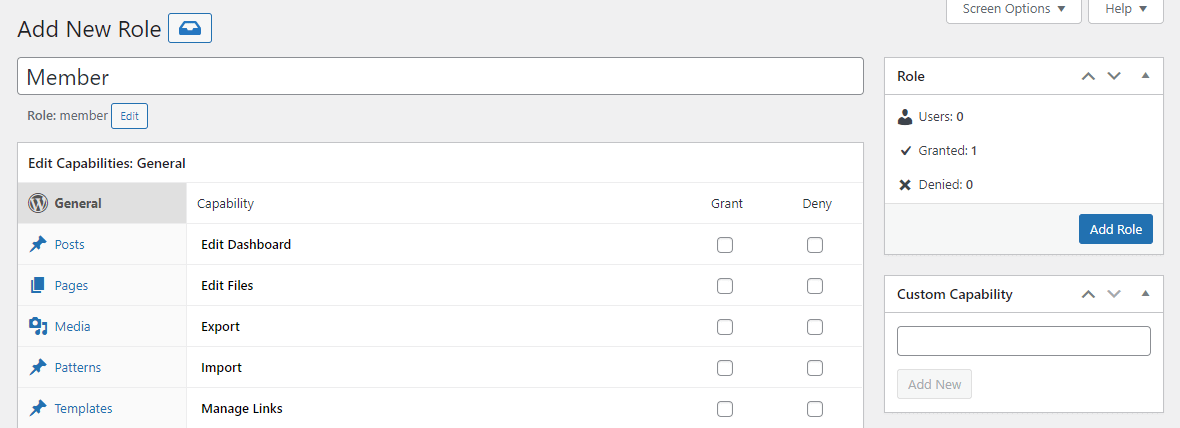
Next, configure the permissions for this role. Permissions prevent members from making any changes to your site — or taking on any tasks reserved for admins. In the General tab, make sure that only the Read permission has the Grant box checked:
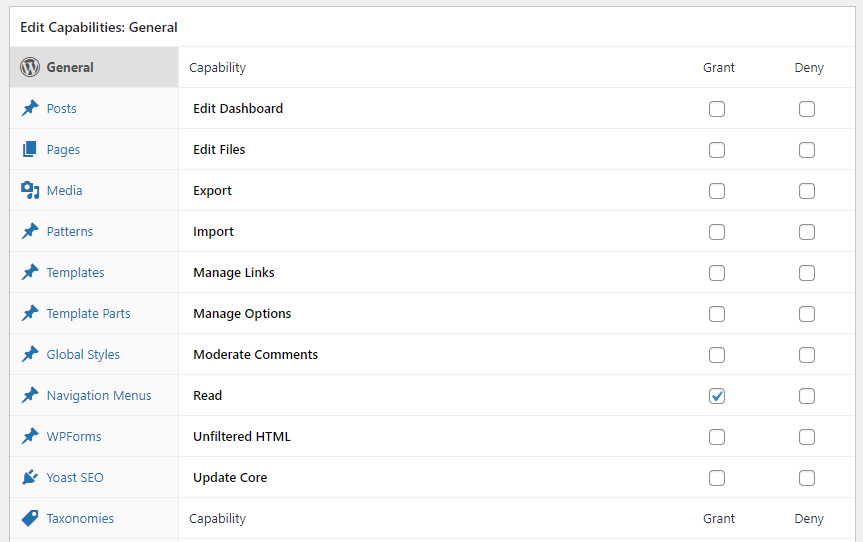
You’ll want to do the same for your posts and pages, unless you want to let members edit and publish content on your site.
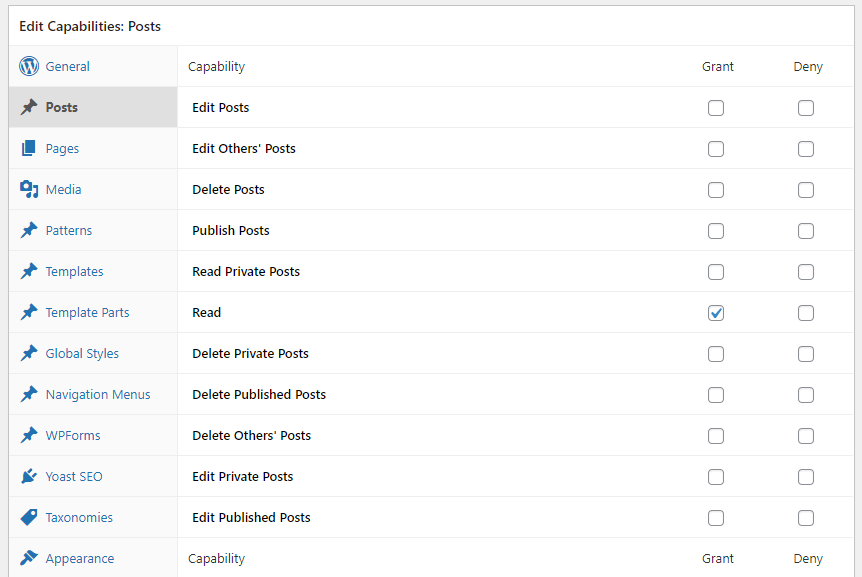
You can go through the rest of the items on the list to select the capabilities you want to grant. In most cases, you’ll want to stick with “read” for those settings. Giving users the ability to edit content and make changes to your website can cause many problems. For everything else, you can check the Deny box.
When you’re ready, click on Add Role. Your new “Member” role (or whatever you called it) should appear on the Roles page.
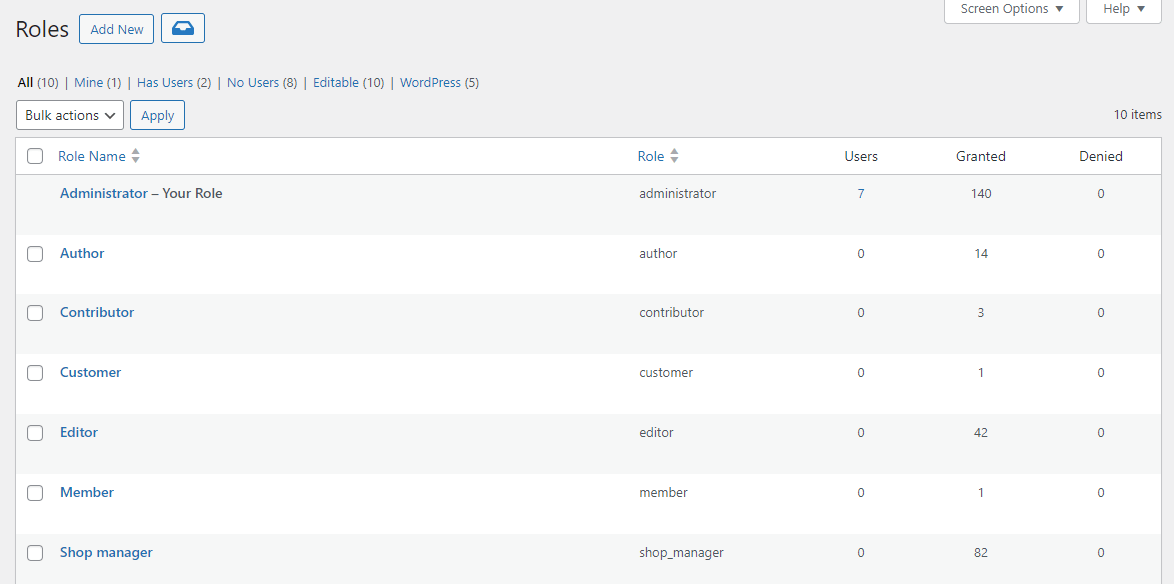
That’s it — we’re done with the Members plugin for now.
Step 4: Build your login and registration forms 📝
As mentioned earlier, Profile Builder automatically creates login and registration pages upon activation. You can view these by navigating to Pages in your dashboard. Look for Login or Register, and select View:

This shows you what the current login or registration form looks like. By default, the Register page has a simple introduction and a form for users to sign up.
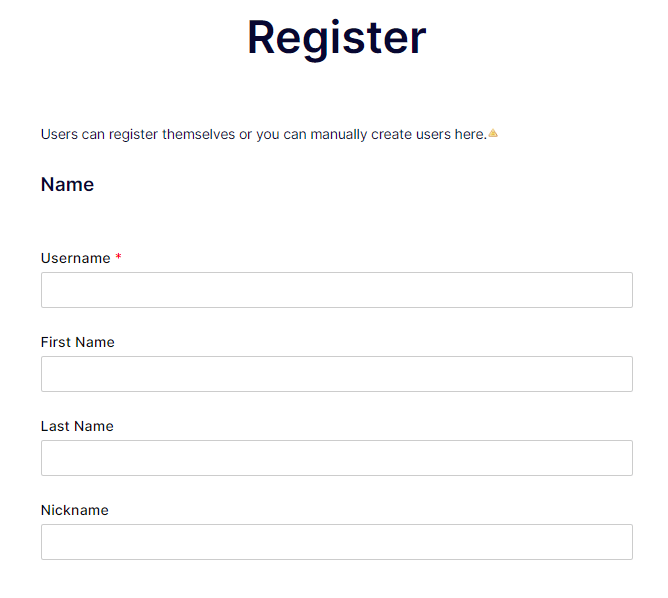
You can ignore the “Users can register themselves…” message at the top; it’s only visible to the admin of the site. You might also notice that the button at the end of the form reads “Add User,” but it will display “Register” to your site’s visitors (or if you log out of your Admin account).
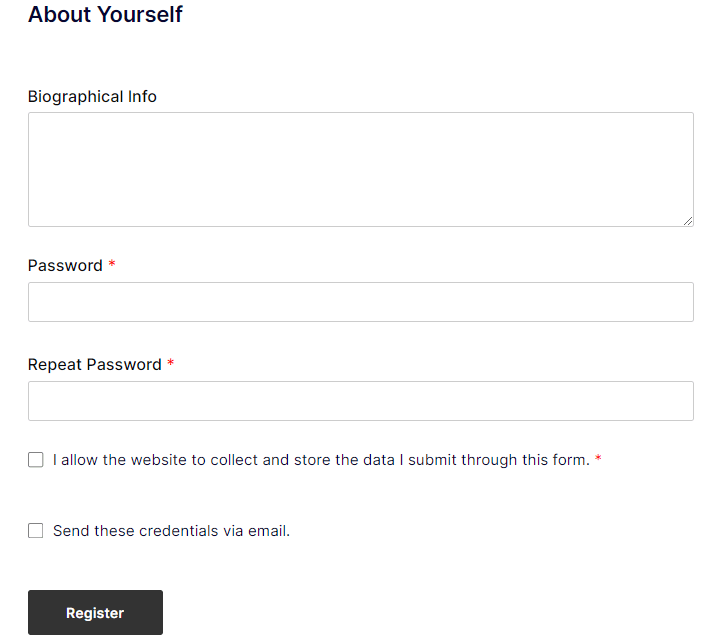
Note that, as the administrator, you can also add members manually by navigating to Users → Add New User.
Editing the registration form
To edit the registration form for your membership site on WordPress, go to Profile Builder → Form Fields. There, you can delete or add new fields.
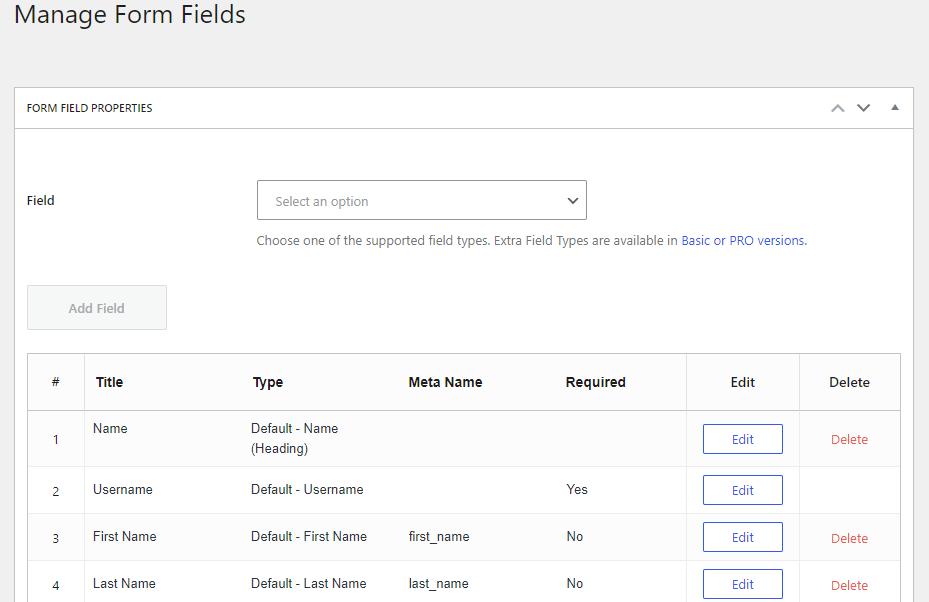
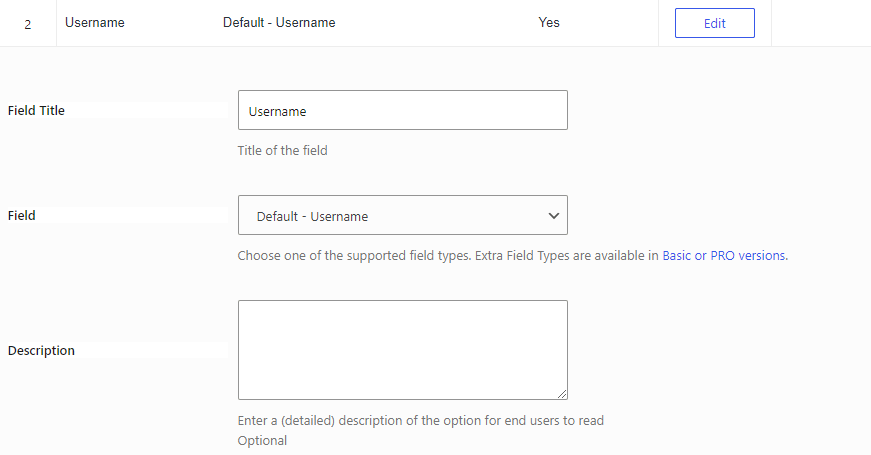
If you want to modify a field, click on the corresponding Edit button. For example, you might give a field a different name or make it mandatory.
If you have a long registration form, it may be a good idea to use headings to create various sections. To do so, click on the drop-down menu for Field and select Heading.
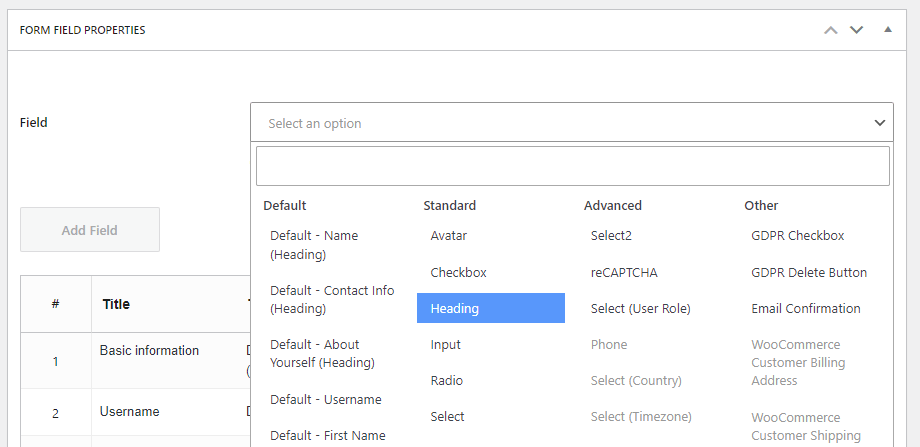
You can add other elements to your form, such as a GDPR checkbox and a reCAPTCHA. The latter will help prevent bot registrations.
Note that you can also drag and drop fields into your preferred orders. Plus, you can refresh the Register page to see your changes.
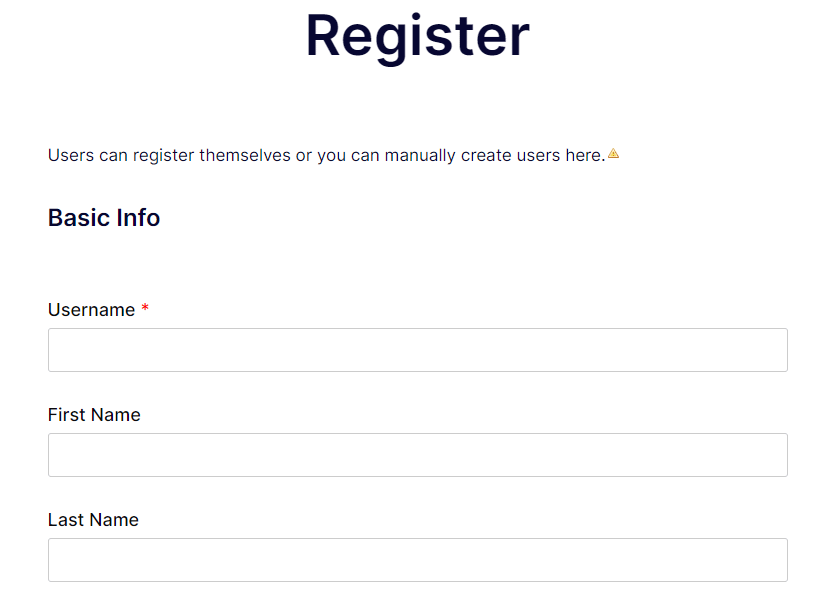
Next, you’ll need to make sure that anyone who submits a registration form automatically receives the Member role. Click to edit the Register page; you should see a shortcode for the registration form.

Add the following to the shortcode:
role="member"
Code language: JavaScript (javascript)So the result should look like:
[wppb-register role="member"]
Code language: JSON / JSON with Comments (json)Remember to click on Update to save your changes to the page.
Editing the login form
There isn’t much you can do to customize the login form. If you go to Profile Builder → Settings, you can choose whether members will log in with their usernames, emails, or both.
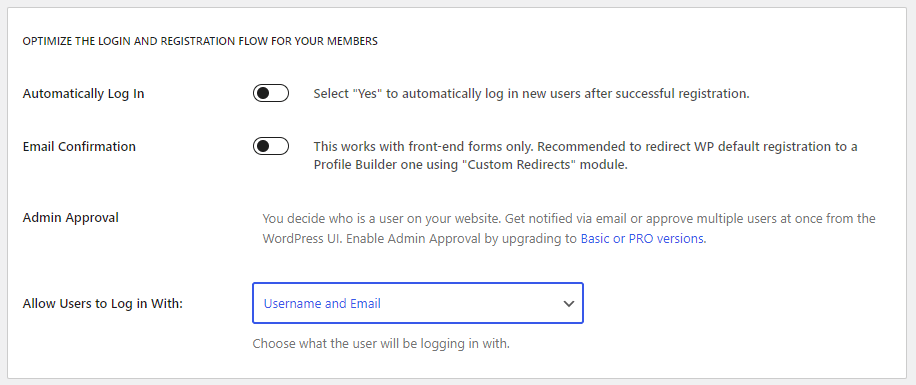
You can also enable automatic login after registration. Remember to save your changes when you’re done. We’ll take a look at this plugin’s other available settings soon.
Step 5: Enable profile editing 👨💻
Profile Builder enables members to edit the details of their accounts. If you go to Pages and click to view the Edit Profile page, you’ll see all the fields that users can change.
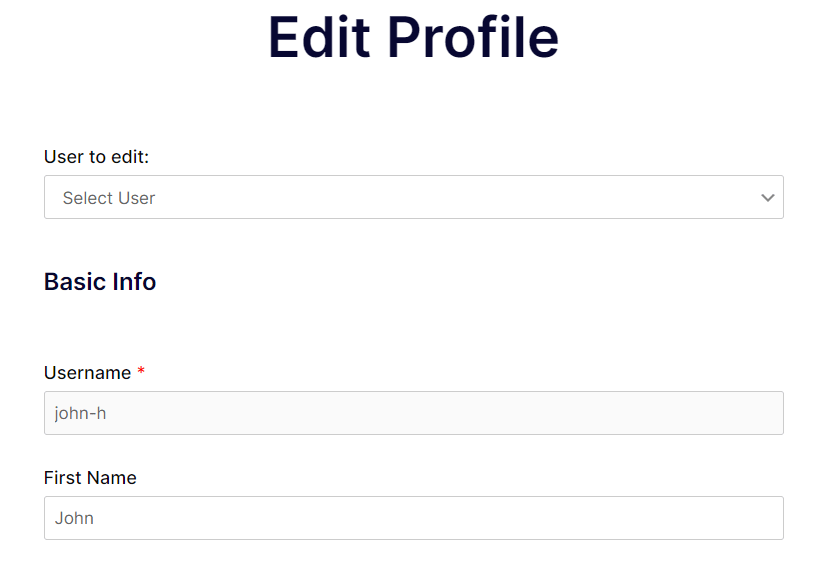
You’ll need to enable this capability for your members. Click to edit the page and look for the Content Permissions section.
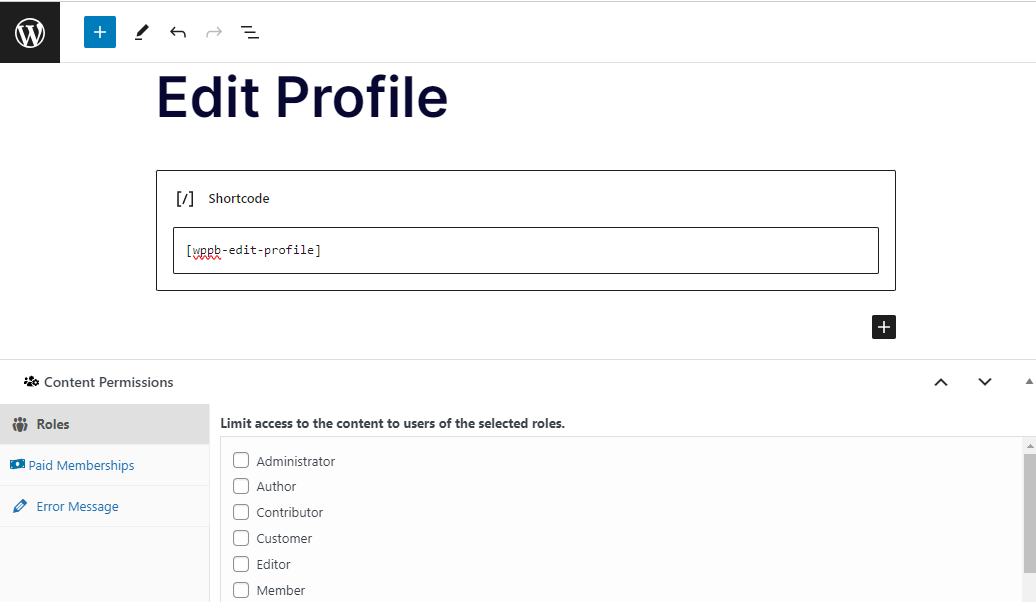
The Members plugin added this section to the Block Editor. Select the Member role and click on the Update button.

Now, members will be able to access their profiles on your membership site and edit their details.
Step 6: Create your members-only content 📚
There are several reasons to create a membership site on WordPress. If you’re a blogger or writer, you might want to make certain articles available to members only. Alternatively, you might want to offer online courses that require registering on your website.
Either way, you’ll need to create content that only members can access. Fortunately, the Members plugin makes this easy. In the previous step, we looked at the Content Permissions section within the Block Editor. You’ll use it again to create your members-only content.
Open the post or page that you want to make available to members only. If you don’t have any content yet, you can come back to this step after you’ve created it.
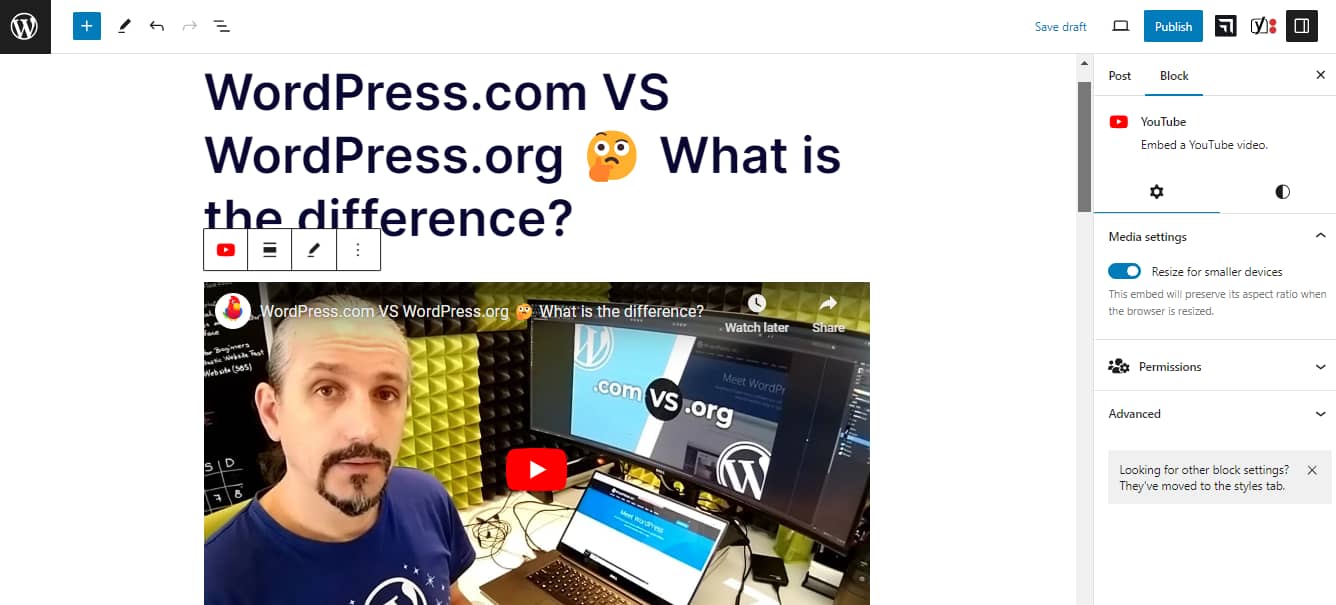
In the Content Permissions section, select Member (as shown in the previous step). Then hit Publish or Update to make your changes live. Now, non-members (or members who aren’t logged in) won’t be able to view this content.
Step 7: Design a custom menu for members 👨👨👦👦
Your members should be able to access all relevant content without any issues. Therefore, when building a membership site on WordPress, it’s smart to create a menu with quick links that simplifies navigation.
In your WordPress dashboard, go to Appearance > Menus and click on the link labeled Create a new menu.

Give your menu a name (like “Members Area”) and click on Create Menu.
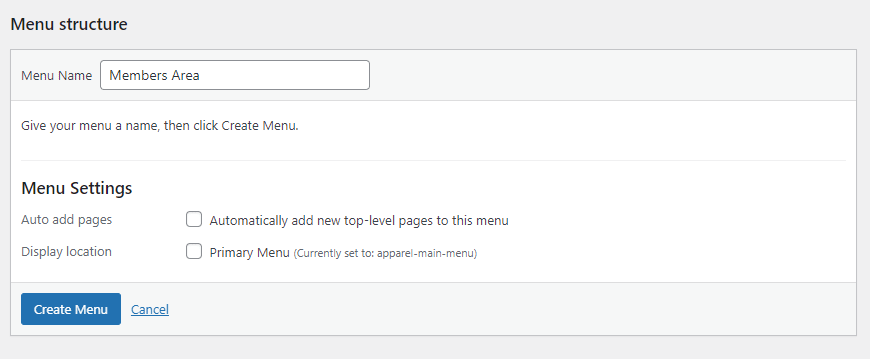
Now you can start adding pages to your members menu.
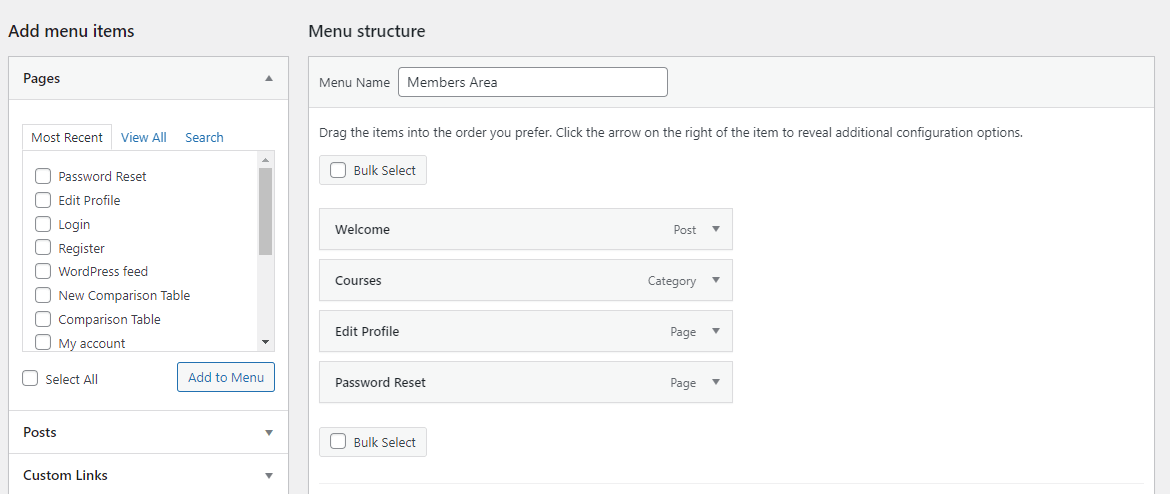
These pages may include your Edit Profile page and any members-only posts or pages you created earlier. When you’re done, click on Save Menu.
Next, click on the Manage Locations tab. Here, you can choose where to display your Members menu. For example, you might add it to your website’s sidebar.
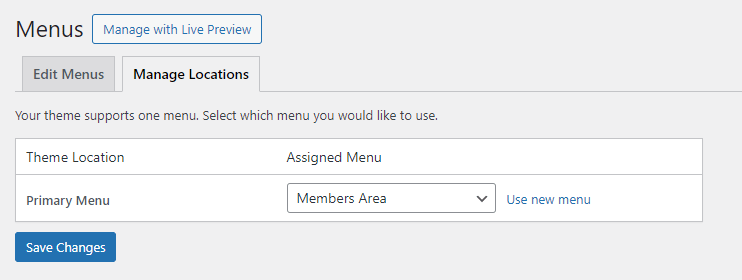
Note that some themes only support one menu, so you might want to opt for a theme that offers several navigation options.
Step 8: Customize your email messages 📧
It’s wise to customize the email messages sent to registered members. To modify emails, go to Profile Builder → Settings and select the Email Customizer tab.
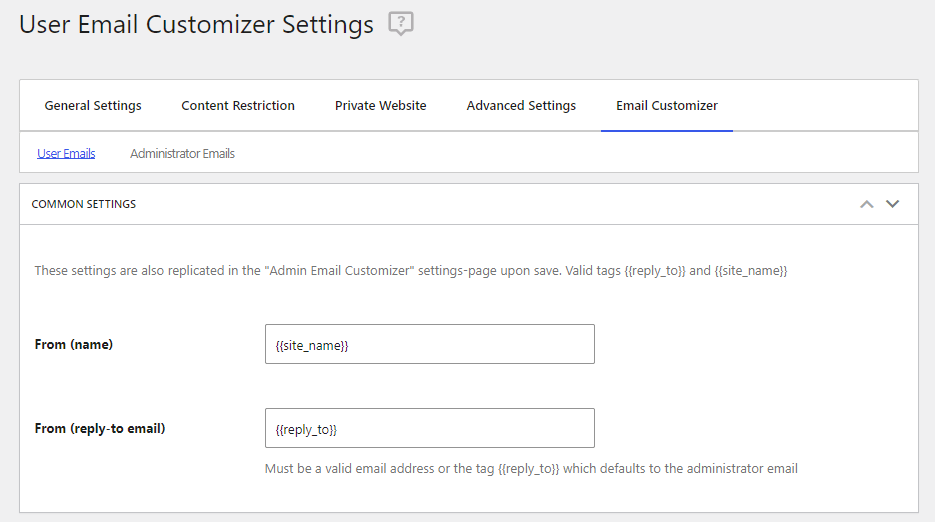
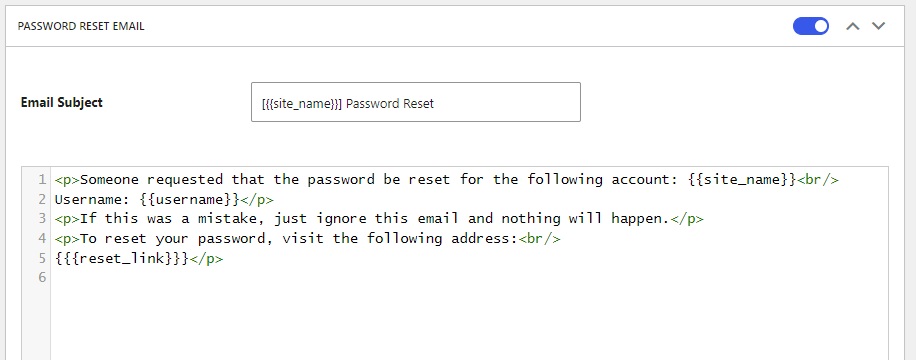
Here, you can edit a variety of emails that automatically get sent to members when they perform particular actions on your site. These actions include registering as members, requesting password resets, and completing email change requests.
If you select the Administrator Emails tab, you’ll see the messages that are sent to you (as the admin of the site).
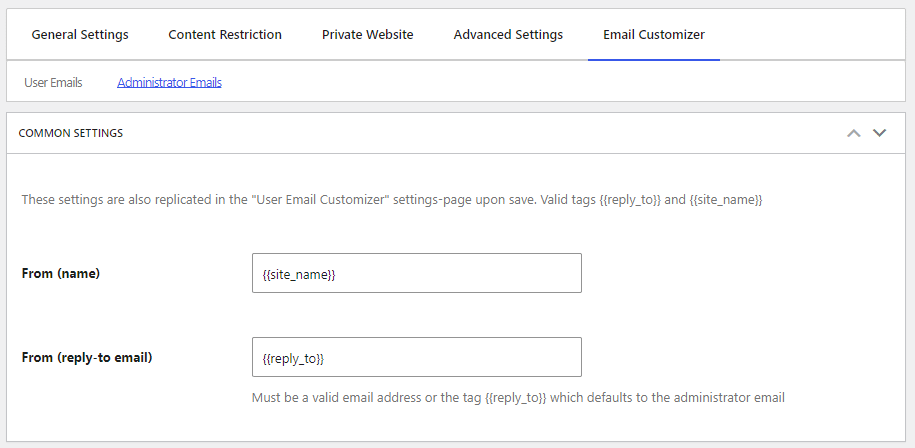
These include notifications for new registrations and password resets. When you’re finished, click on the Save Changes button.
Step 9: Configure advanced settings for members ⚙️
Finally, let’s look at the additional settings you can configure for your membership site on WordPress. If you go to Profile Builder → Settings → General Settings, you’ll see the option to enable two-factor authentication and the enforcement of strong passwords for members.
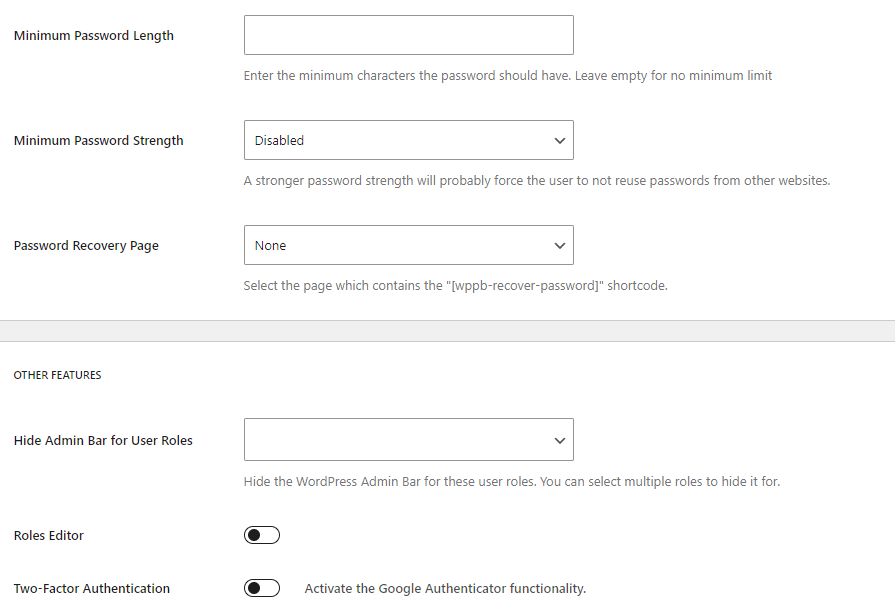
These settings can help make your website more secure.
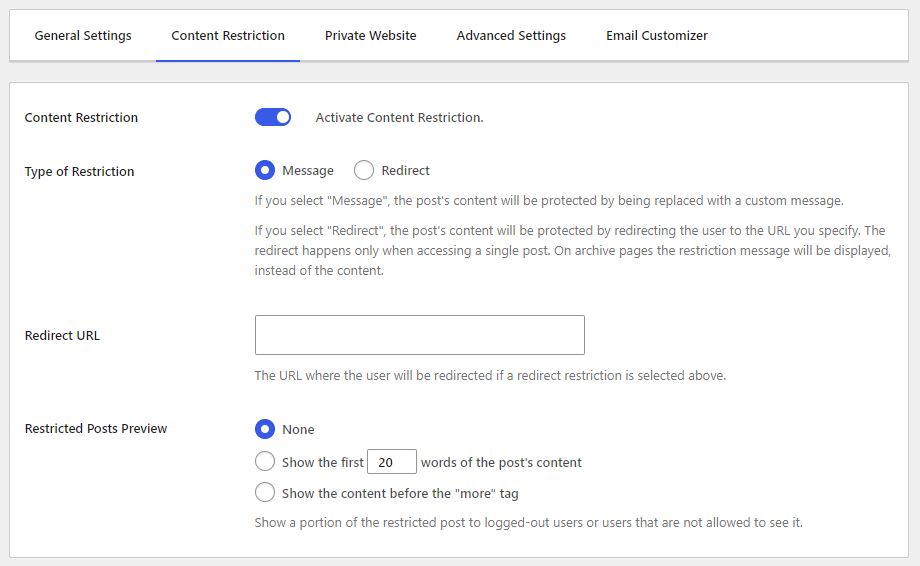
Next, go to the Content Restriction tab. If you activate this setting, you can select what users will see when they try to access members-only content. For example, you might display the first 20 words of a post or redirect non-members to the registration page.
Let’s move on to the Advanced Settings area. In the Forms section, you can choose what happens when a member resets their password. Other options include email domain registration, placeholder labels, and a “Remember Me” checkbox on the login page.

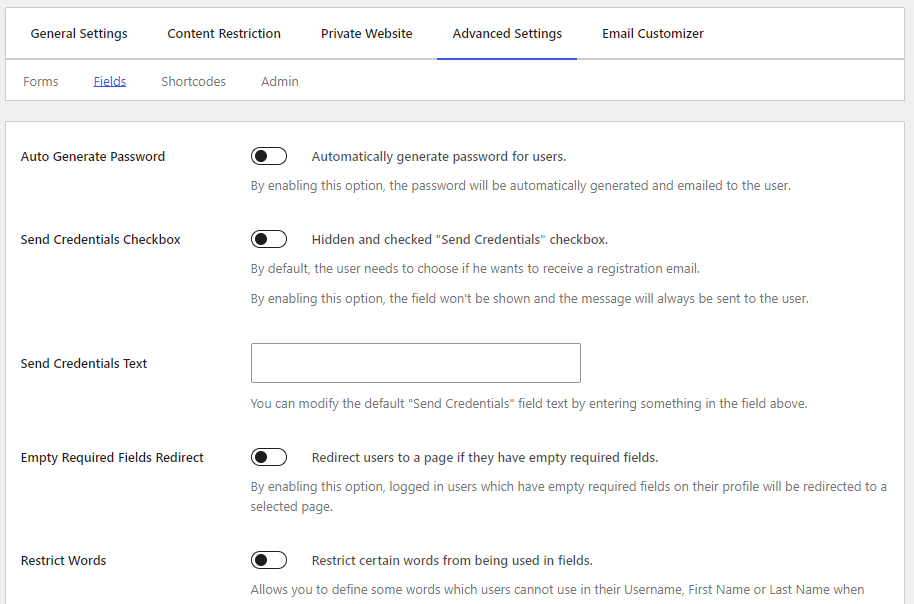
If you go to the Fields tab, you’ll see an option to generate passwords automatically for members, restrict certain words from being used in the registration fields, and other useful settings.
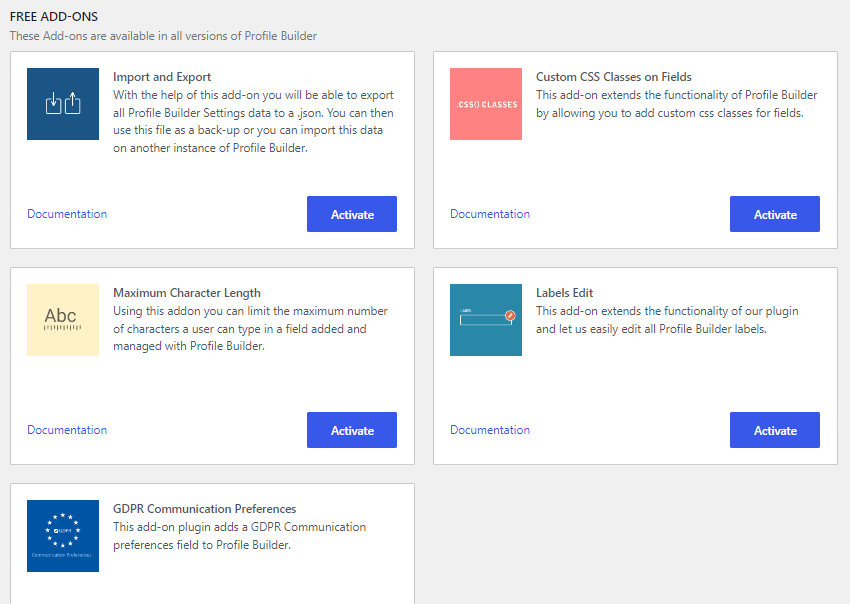
Feel free to explore the rest of the options in the Profile Builder. You can also have a look at the add-ons included with the plugin:
- Import and Export
- Custom CSS Classes on Fields
- Maximum Character Length
- Labels Edit
- GDPR Communications Preferences
If you decide to upgrade to Profile Builder Pro in the future, you’ll get access to more add-ons, including BuddyPress and WooCommerce integrations.
Enjoy building a membership site on WordPress 🤩
With WordPress, you can create a membership website for free (aside from your hosting and domain). This is ideal if you’re not planning to monetize your members-only content or you don’t have a large budget to work with.
As we’ve seen, you can use the free versions of Members and Profile Builder to build a fully customized membership site. You’ll be able to create a new WordPress role for your members, set up login and registration forms, make certain content available to members only, and much more.
Do you have any other questions about how to create a membership site on WordPress? Let us know in the comments section below!


