How to Create a Sticky Header in WordPress (4 Methods)
In this post, we’ll take a closer look at sticky headers and discuss some best practices. Then we’ll show you four ways to create a WordPress sticky header. Let’s jump right in! 🦘
📚 Table of contents:
- Use a plugin like Sticky Menu & Sticky Header
- Add a sticky header using the Full-Site Editor (FSE)
- Create a sticky header using CSS
- Install a premium theme with a built-in WordPress sticky header
What is a sticky header (and why should you use one)?
A WordPress sticky header is also known as a “fixed header,” since the header remains visible even when visitors scroll down your page. This way, people can still access your navigation menu even as they interact with your website.
As such, a sticky header is a great way to improve your site’s user experience (UX), since it makes your web pages easily accessible. This enables people to find what they’re looking for quickly, which can help you reduce bounce rates and increase time on site.
Better yet, a sticky header encourages visitors to explore other areas of your site. For instance, if you run an ecommerce shop, customers may see interesting products or categories listed in the header. This provides a valuable opportunity to increase your revenue.
Meanwhile, you can include all sorts of elements in your WordPress sticky header. For example, you might feature a call to action (CTA) button, which could boost conversions if it’s visible at all times. You might also add your logo, social media links, shopping cart icon, or business hours.
Best practices for creating a WordPress sticky header
Since a WordPress sticky header should improve your site’s UX, it’s important to consider some best practices to make sure it’s as user-friendly as possible. Here are the key factors to keep in mind:
- 🤏 Make it small. If your header is visible at all times, you don’t want it to take up too much screen space and interfere with your main content.
- 😎 Keep it simple. While it can be a good idea to include useful elements like CTAs and logos, avoid packing your header with too many components that might cause distractions.
- 🎨 Apply your brand colors. To make sure your header fits in with the rest of your website, it’s essential to choose fonts and colors that reflect your branding.
- 🎯 Focus on value. Since you don’t want to overcrowd your header, it’s best to pick the menu items that are most relevant (and useful) to your visitors. For example, if you run an ecommerce store, it’s a good idea to prioritize the shopping cart icon and search bar.
- 📱 Create a separate menu for mobile devices. Since mobile screens are much smaller than desktops, you can create a separate (smaller) sticky header with reduced font size and more hidden menu items. This way, you can offer a better mobile experience.
- 🎬 Add a hover animation. To make your header less invasive, it’s a good idea to make it transparent when it first loads. When a visitor hovers over the header, you can change the background to a solid color so that your menu items are easier to see.
The key is to build an effective sticky header without distracting from your main content. It may take some experimentation to strike the right balance, but the following methods will help to simplify that process.
How to create a WordPress sticky header (4 methods)
Now that you know why it’s a good idea to create a sticky header, here are four ways to do it in WordPress. Each approach offers its own pros and cons, so we’d recommend reading through all four before selecting the method that’s the best fit for your website.
1. Use a plugin like Sticky Menu & Sticky Header
The simplest way to create a WordPress sticky header is to use a plugin. This is a beginner-friendly method, since you don’t need to use code. Plus, the Sticky Menu & Sticky Header plugin works with just about any WordPress theme.
To begin, you’ll need to install the plugin through the WordPress dashboard. Go to Plugins → Add New, and find the plugin using the search bar. Then click on Install Now → Activate:
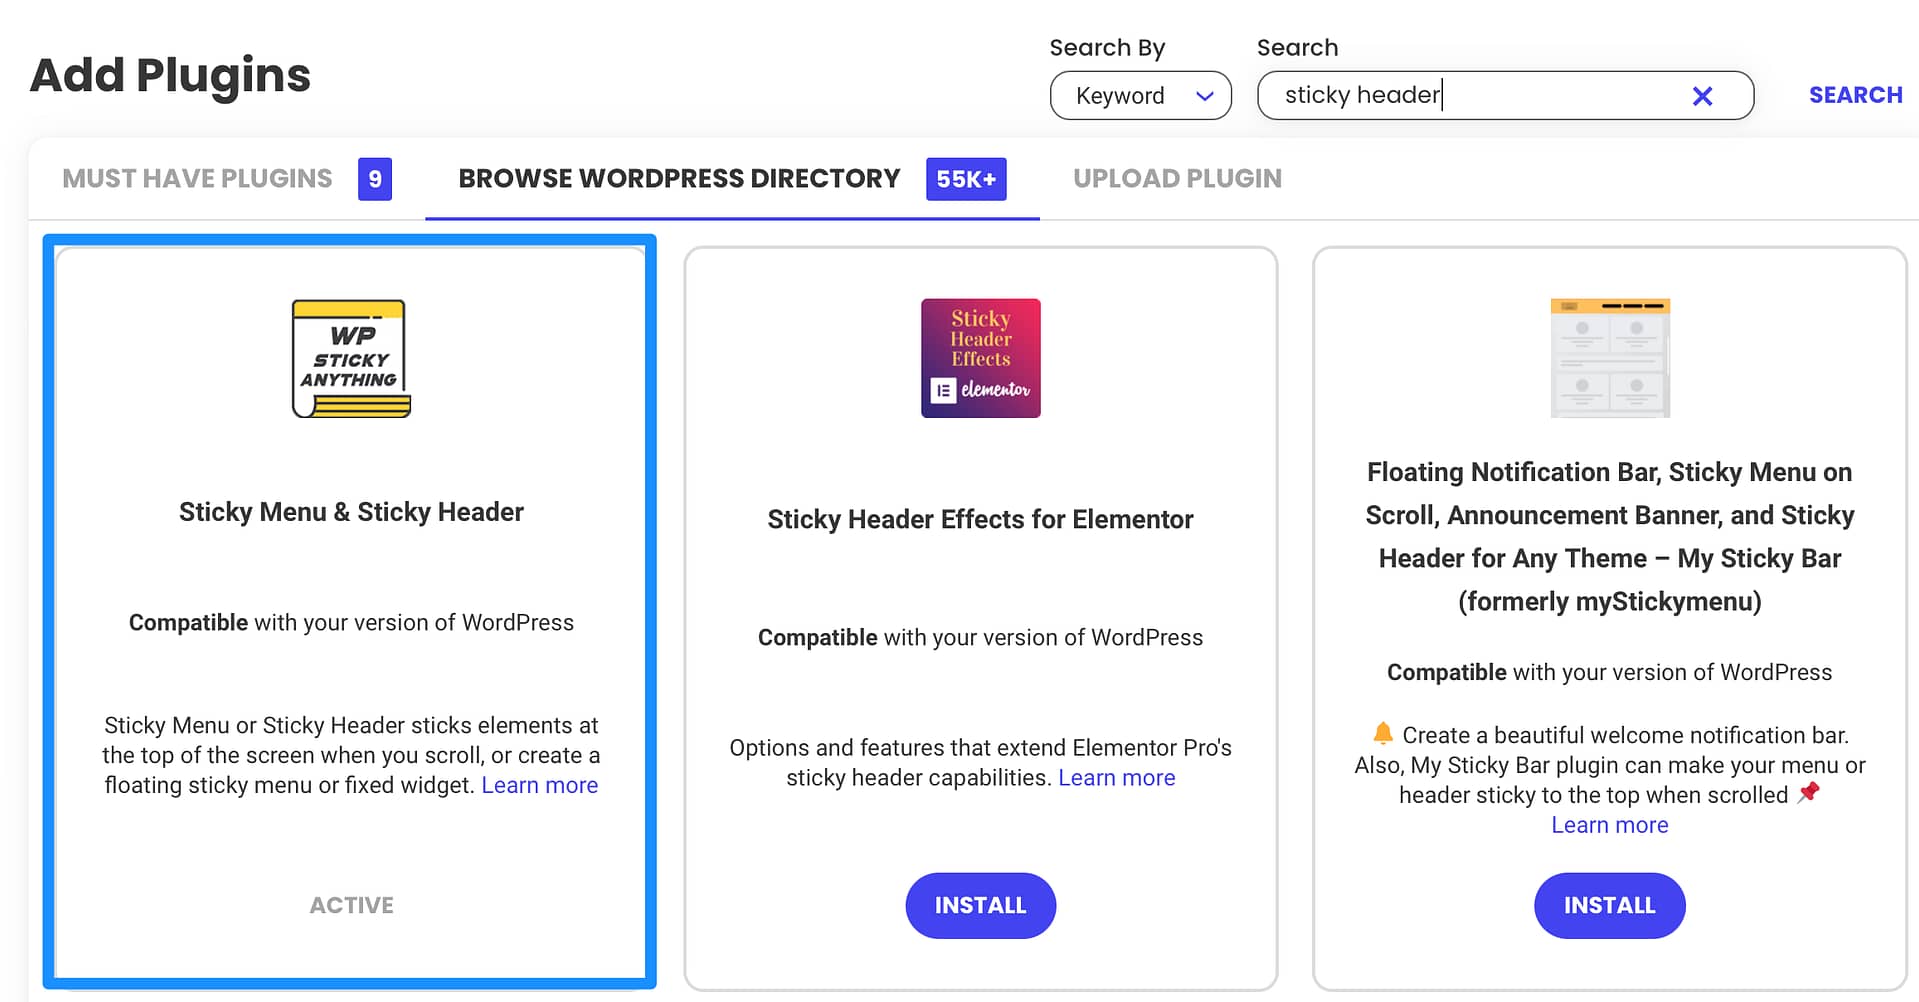
To set up your sticky header with the plugin, head to Settings in the WordPress sidebar and select Sticky Header (or Anything!). Since the plugin lets you create all kinds of sticky elements, you’ll need to enter the ID or class for your theme’s header in the Sticky Element box.
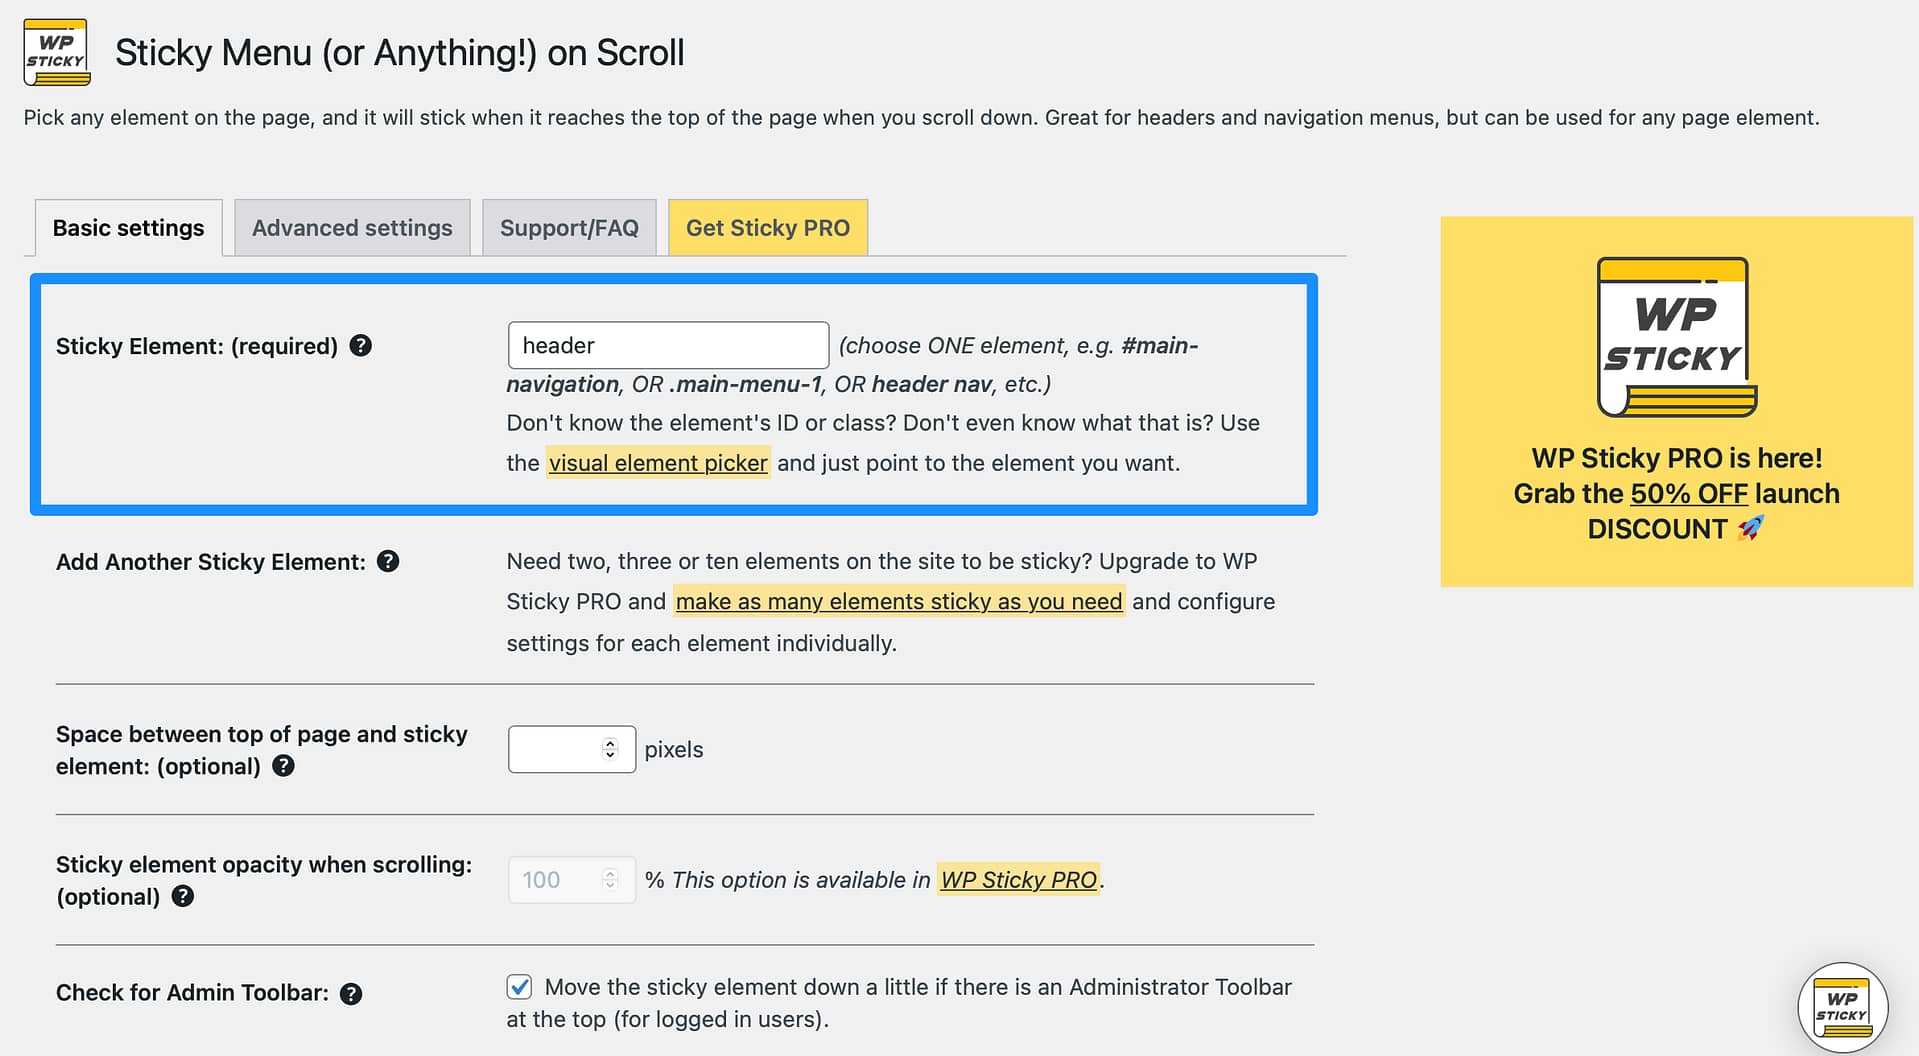
If you don’t know your header’s ID or class, open your website in a new tab. Then, right-click in the header area and click on Inspect Element.
Some of this plugin’s settings are only available with the premium version. For example, if you want to apply a background color to your sticky header, change the opacity, and add other effects, you’ll need to upgrade.
However, you can use the Basic settings to define spacing between the top of the page and the sticky header. Plus, you can disable the sticky header on very large or small screens, where it may not display properly.
Then, click on Save Changes and test your sticky header on the front end.
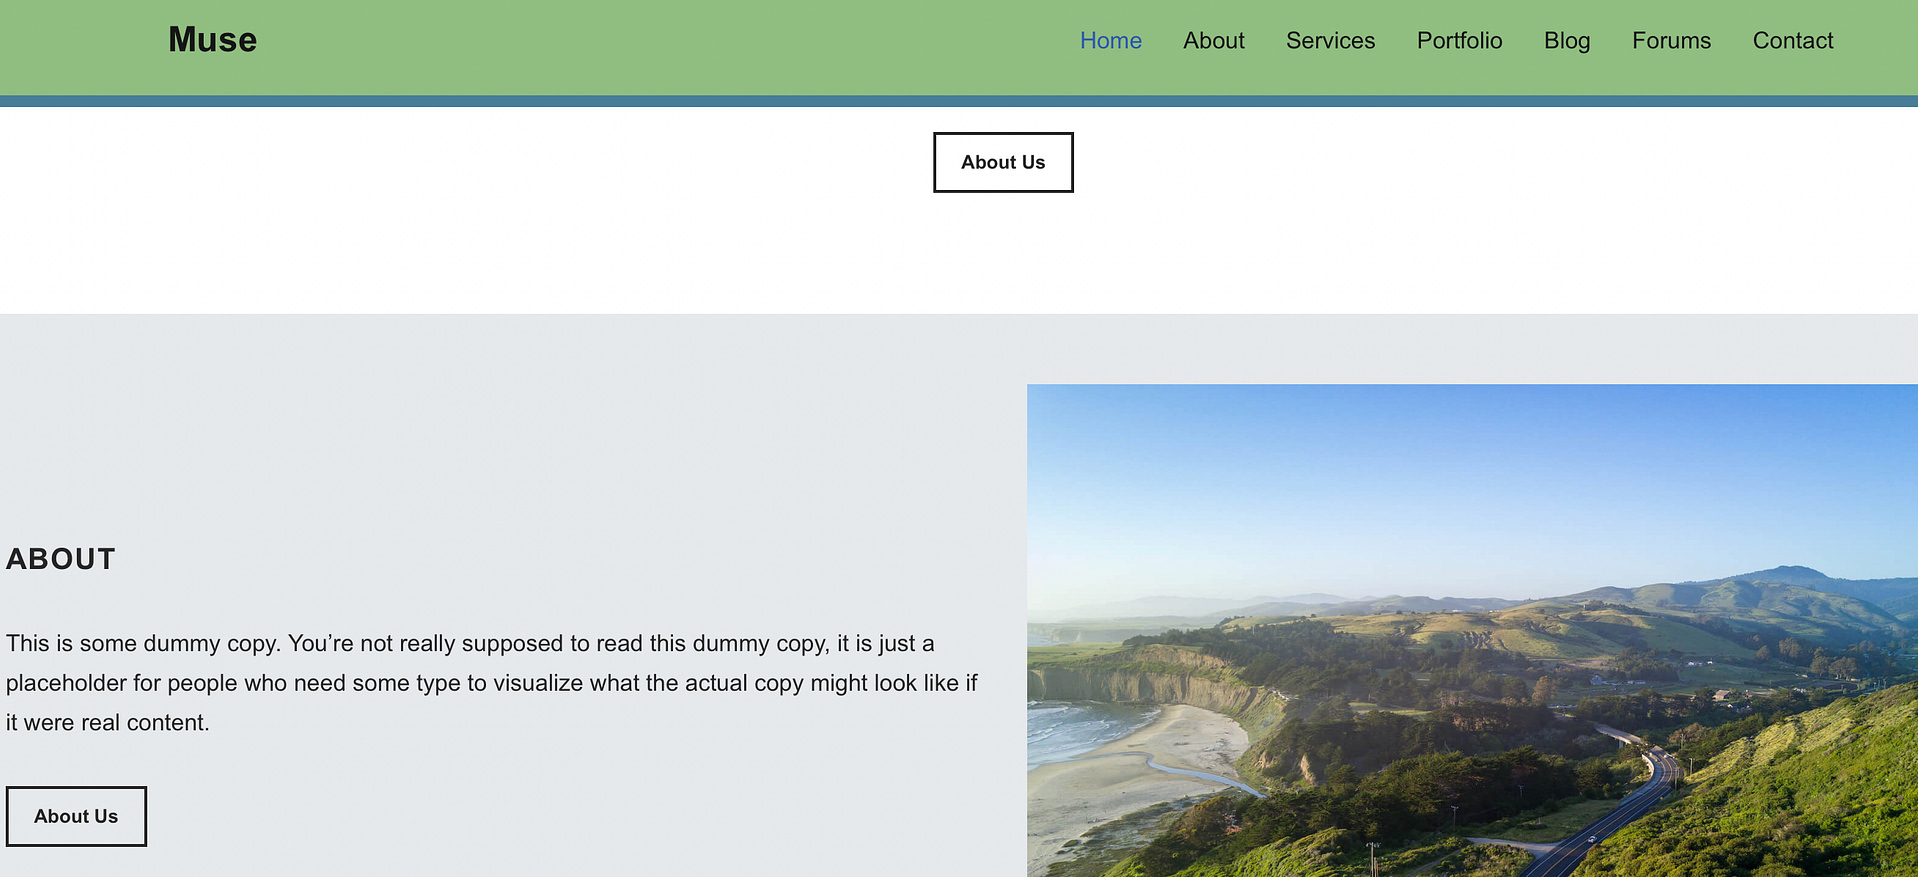
Scroll down on the page and watch to see how the header responds. Does it stay in view as you move elsewhere? Does it have fluid movements? If so, you’re good to go!
If you use a block theme, you can create a WordPress sticky header using the built-in functionality offered by the Full-Site Editor (FSE).
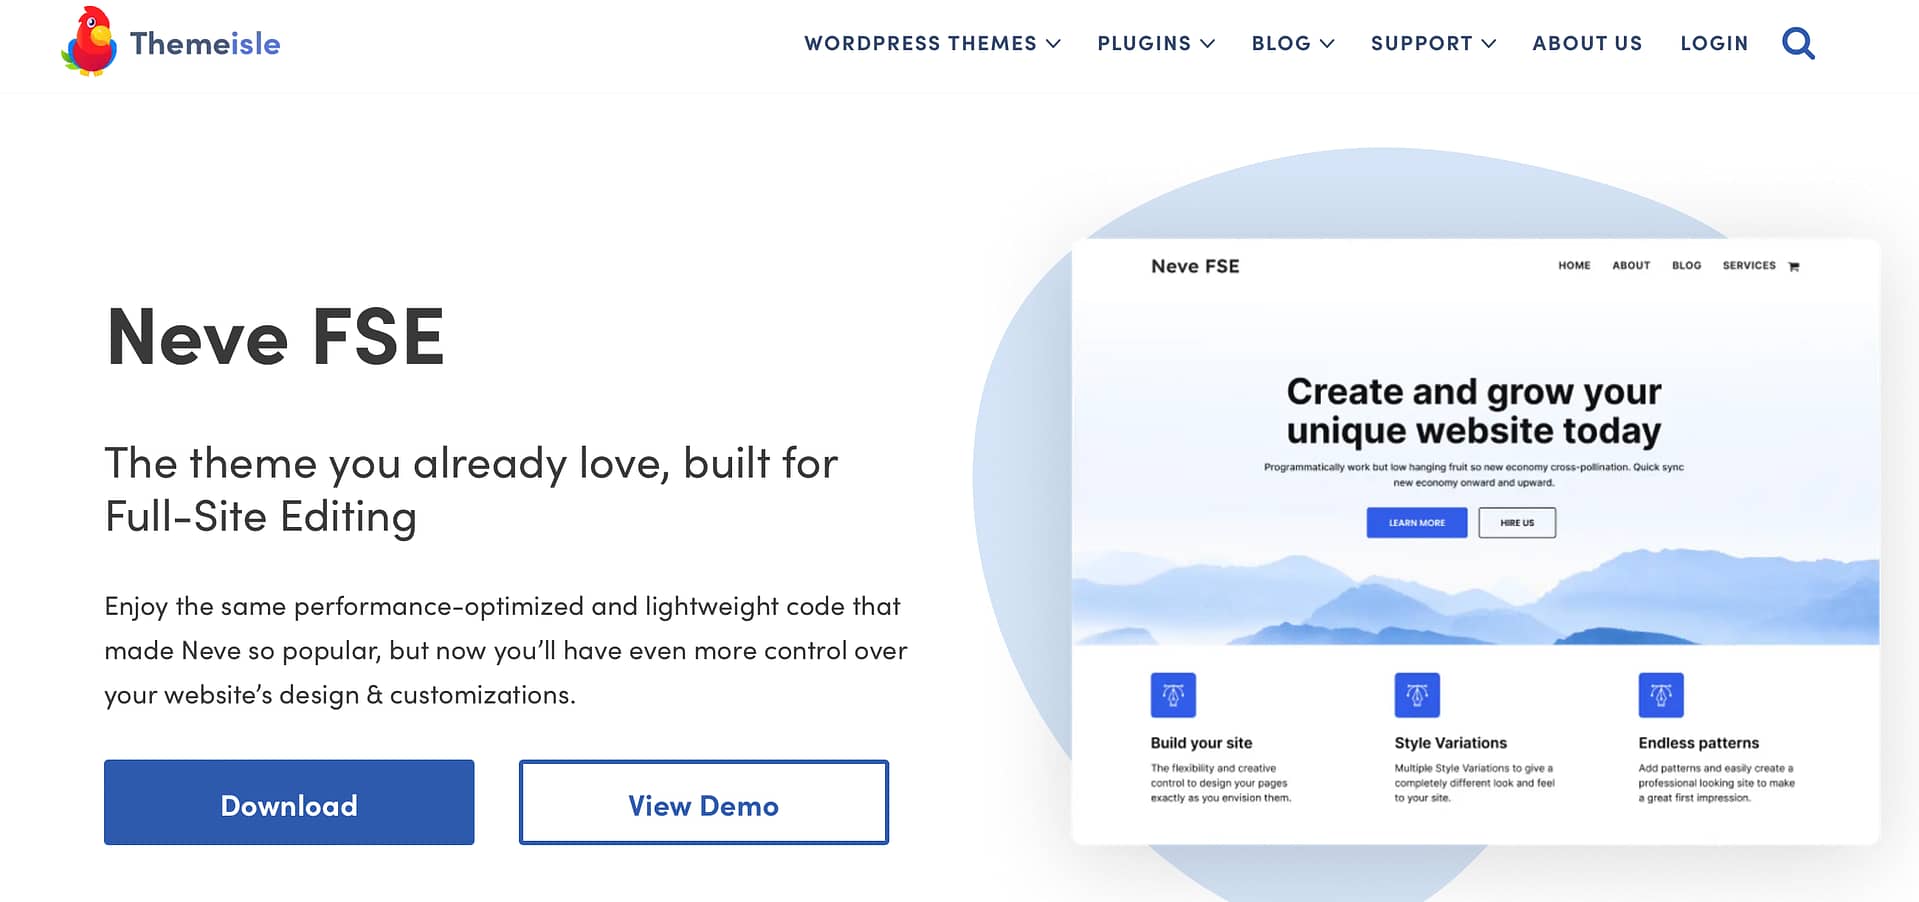
If you don’t already have one, you should first install a block theme like Neve FSE. This theme provides a modern, minimalistic design that suits many types of websites, like blogs, portfolios, or ecommerce shops.
Then, in your dashboard, go to Appearance > Editor and find the template for your theme’s header. This will likely be stored under Templates or Patterns, but it depends on your chosen theme.
In Neve, you’ll find it under Patterns → Header → Header. Then click on the pencil icon beside the template to get started.
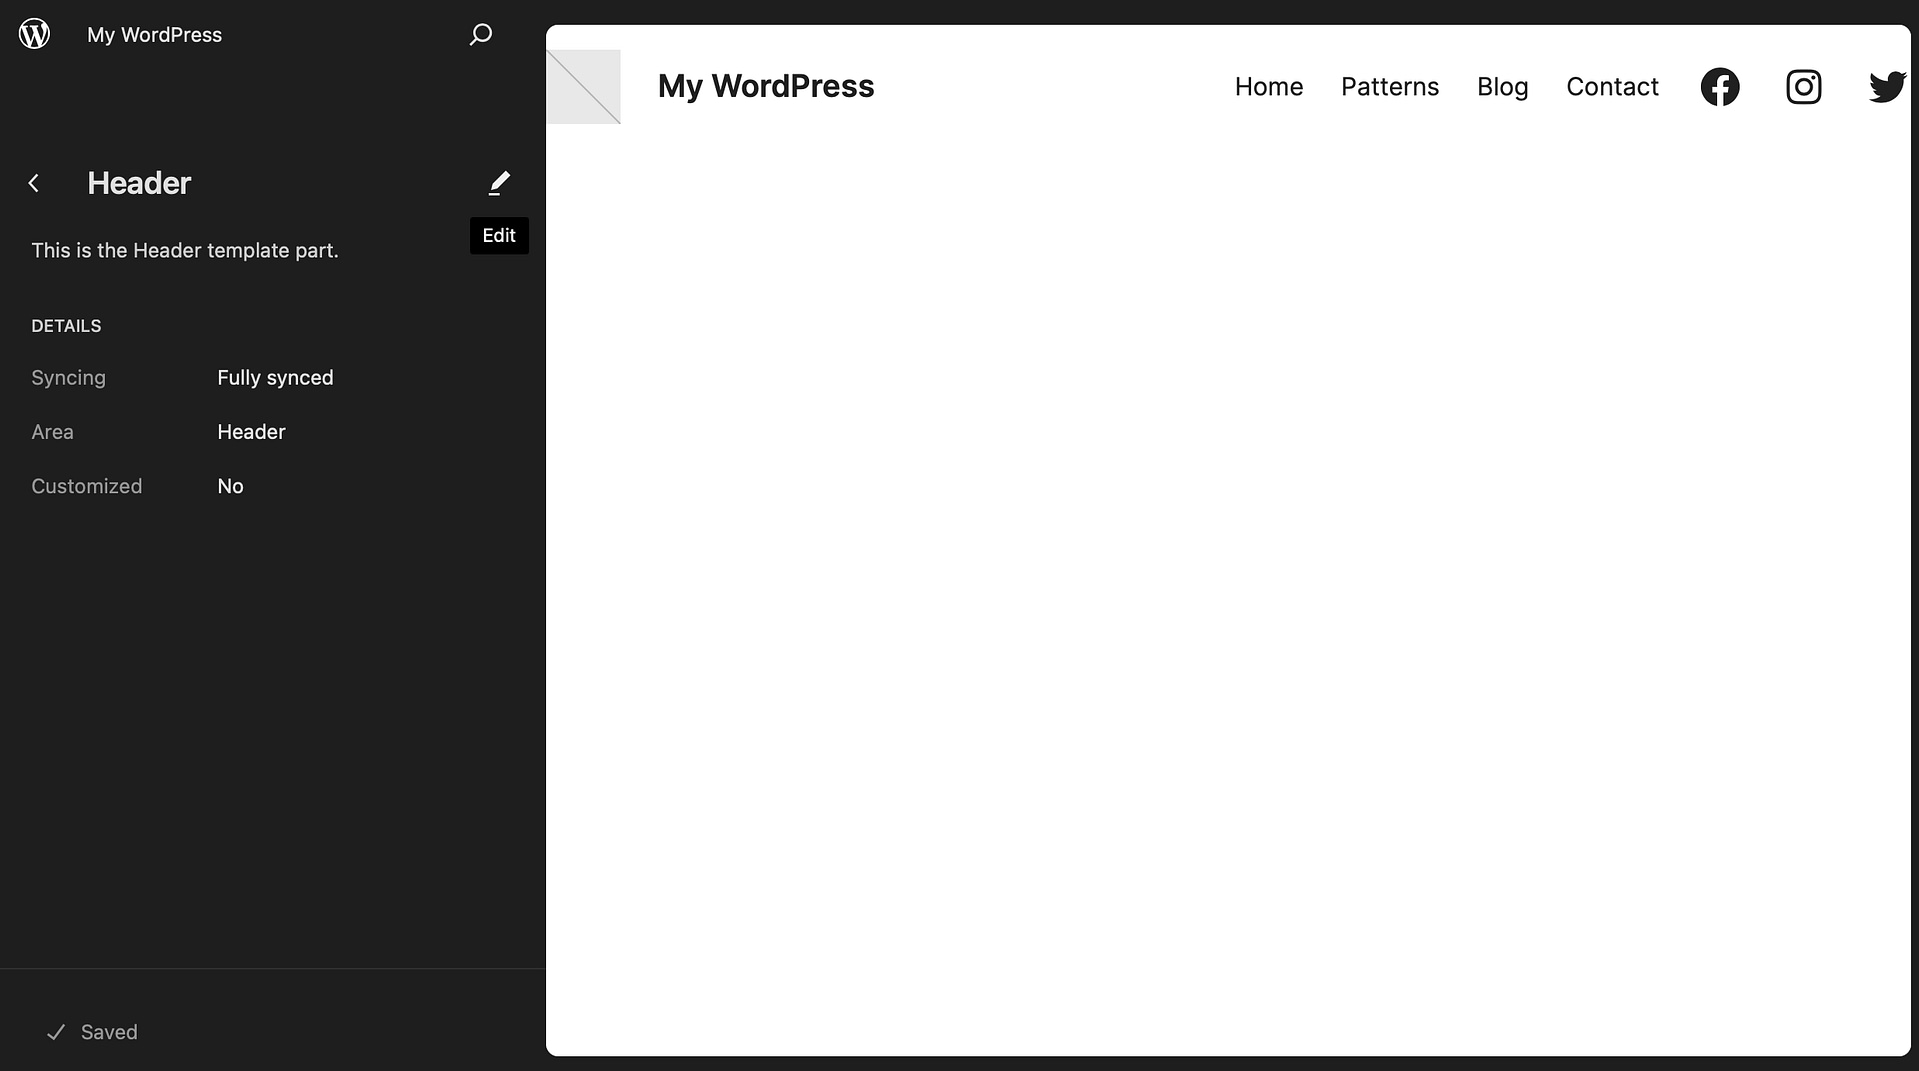
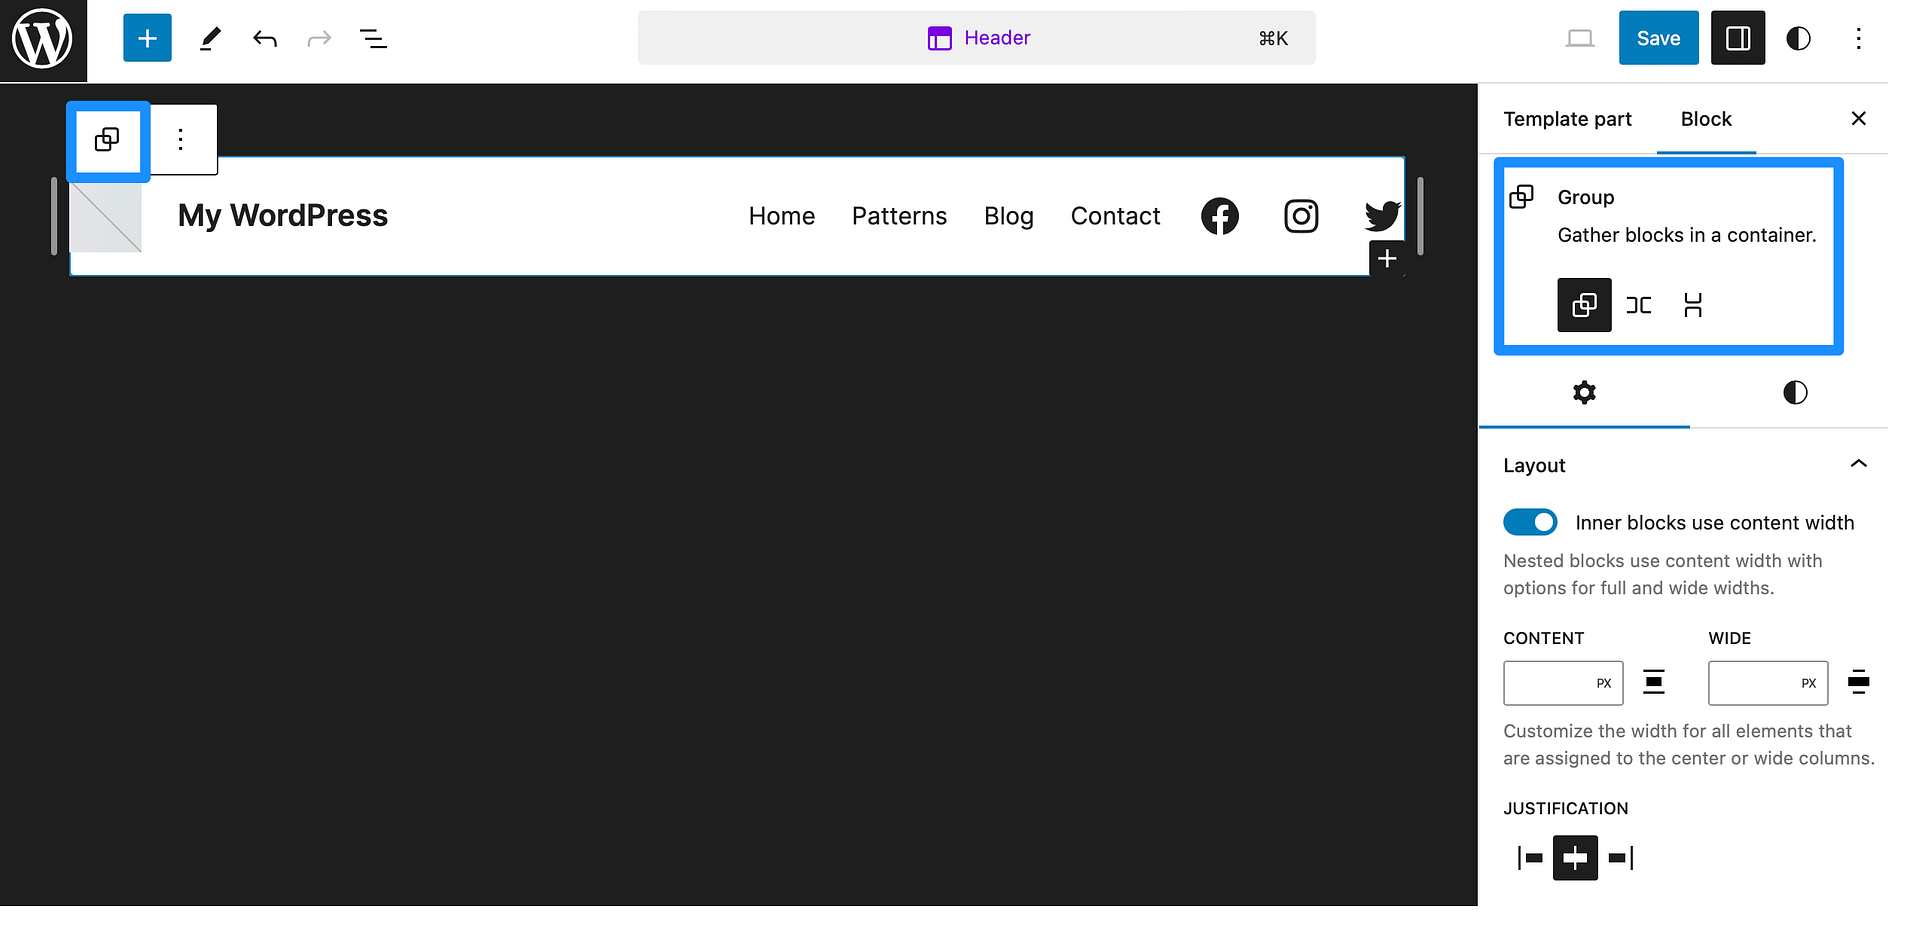
Open the settings in the top-right corner beside the Save button. Select the header in the editor, and click on Group in the toolbar.
Alternately, in the block settings, you can click on the group icon to gather all of your header items inside a container.
Now, scroll down and open the Position tab. Use the drop-down menu to select the Sticky option.
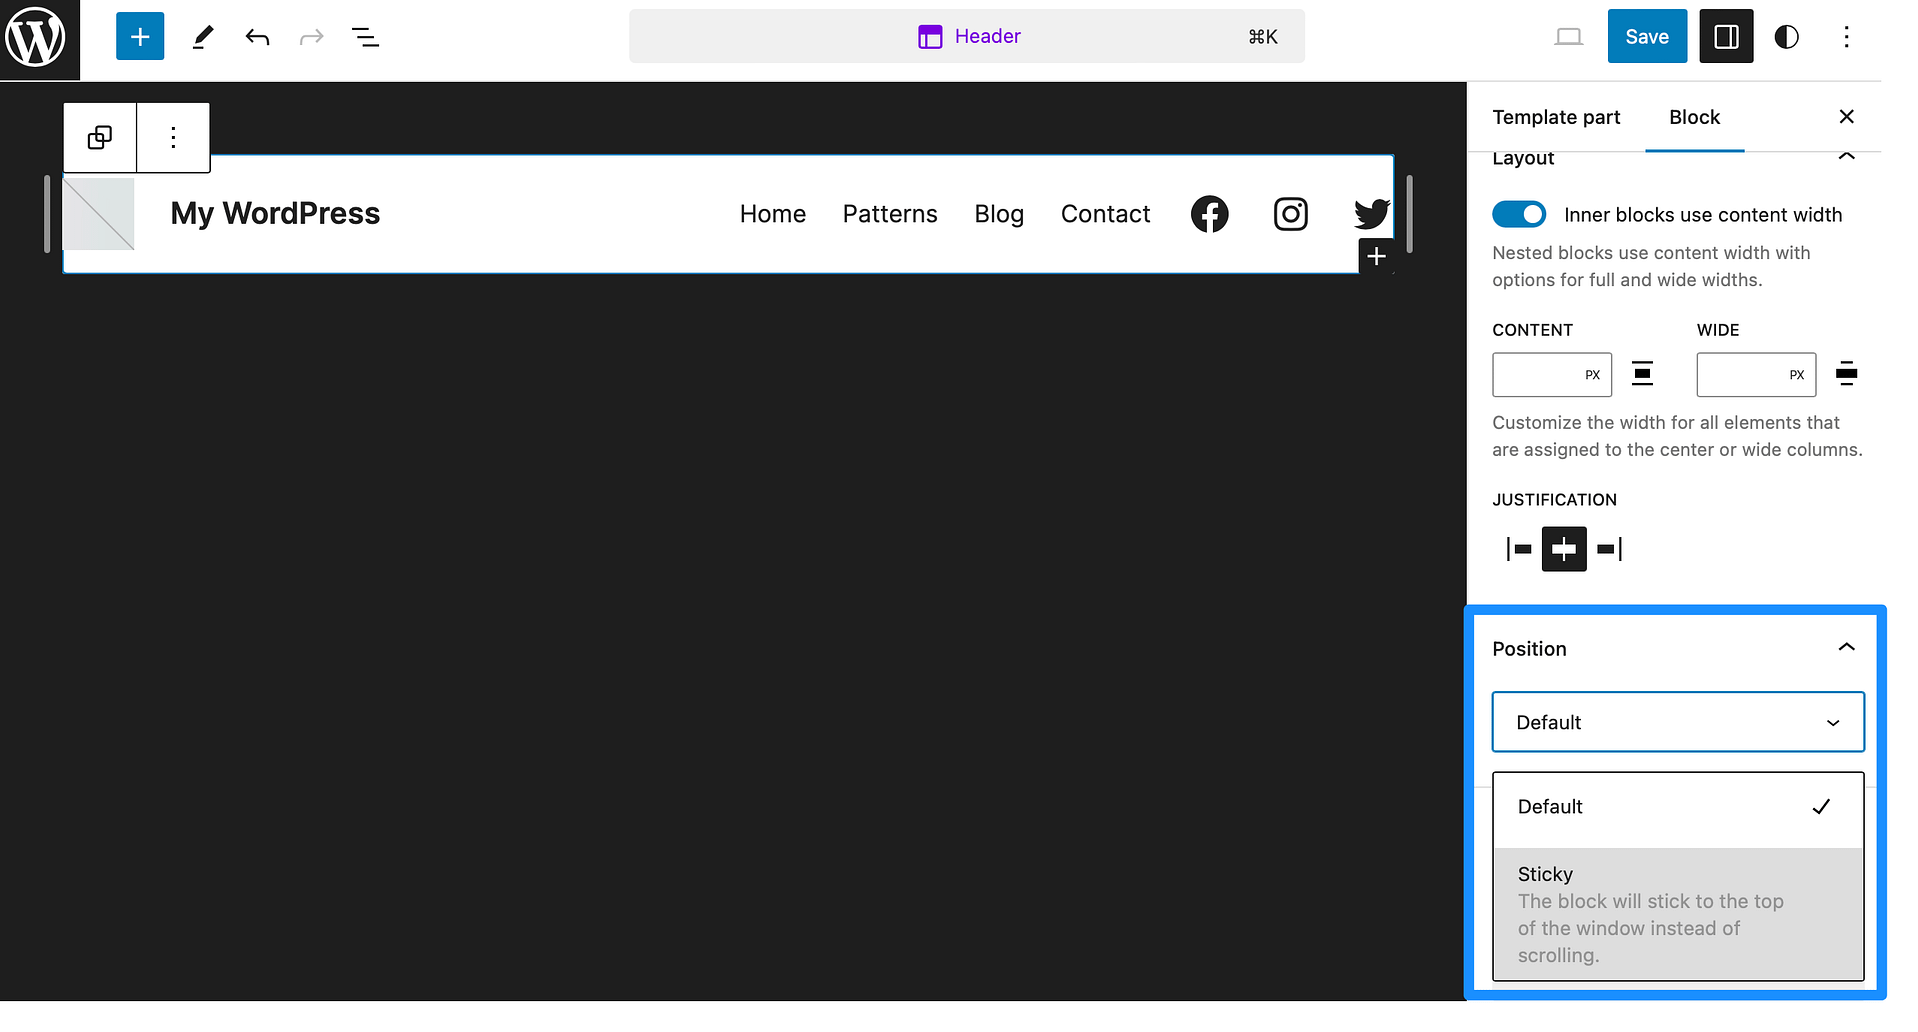
The header will appear transparent upon scrolling, so you might want to apply a background color. To do that, switch over to the Styles tab. You can also change the typography and dimensions of your header there.
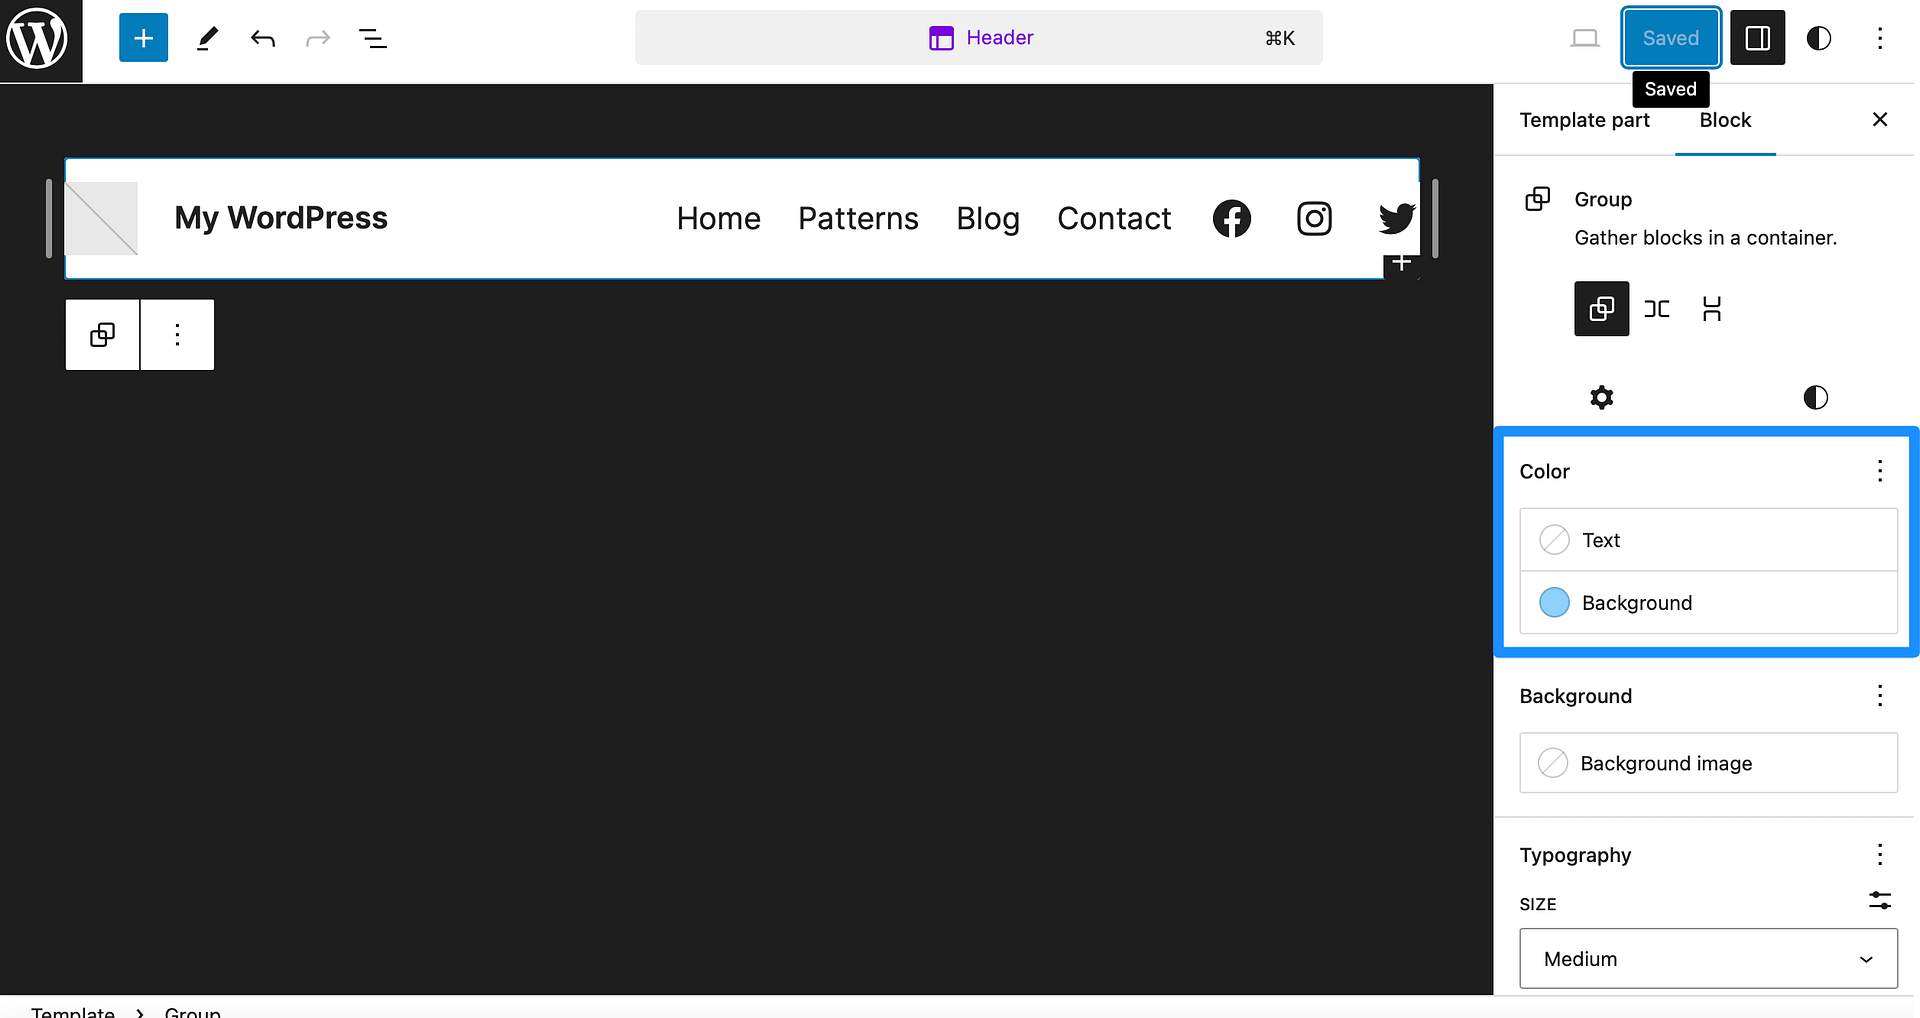
Finally, click on Save and preview your sticky header on the front end of your site! You can always return to make further changes until your header looks just right.
For more experienced users who don’t want to rely on plugins (or want more complete control), you can create a sticky header manually using CSS. To get started, open the WordPress Customizer by going to Appearance → Customize. Then locate the Additional CSS tab.
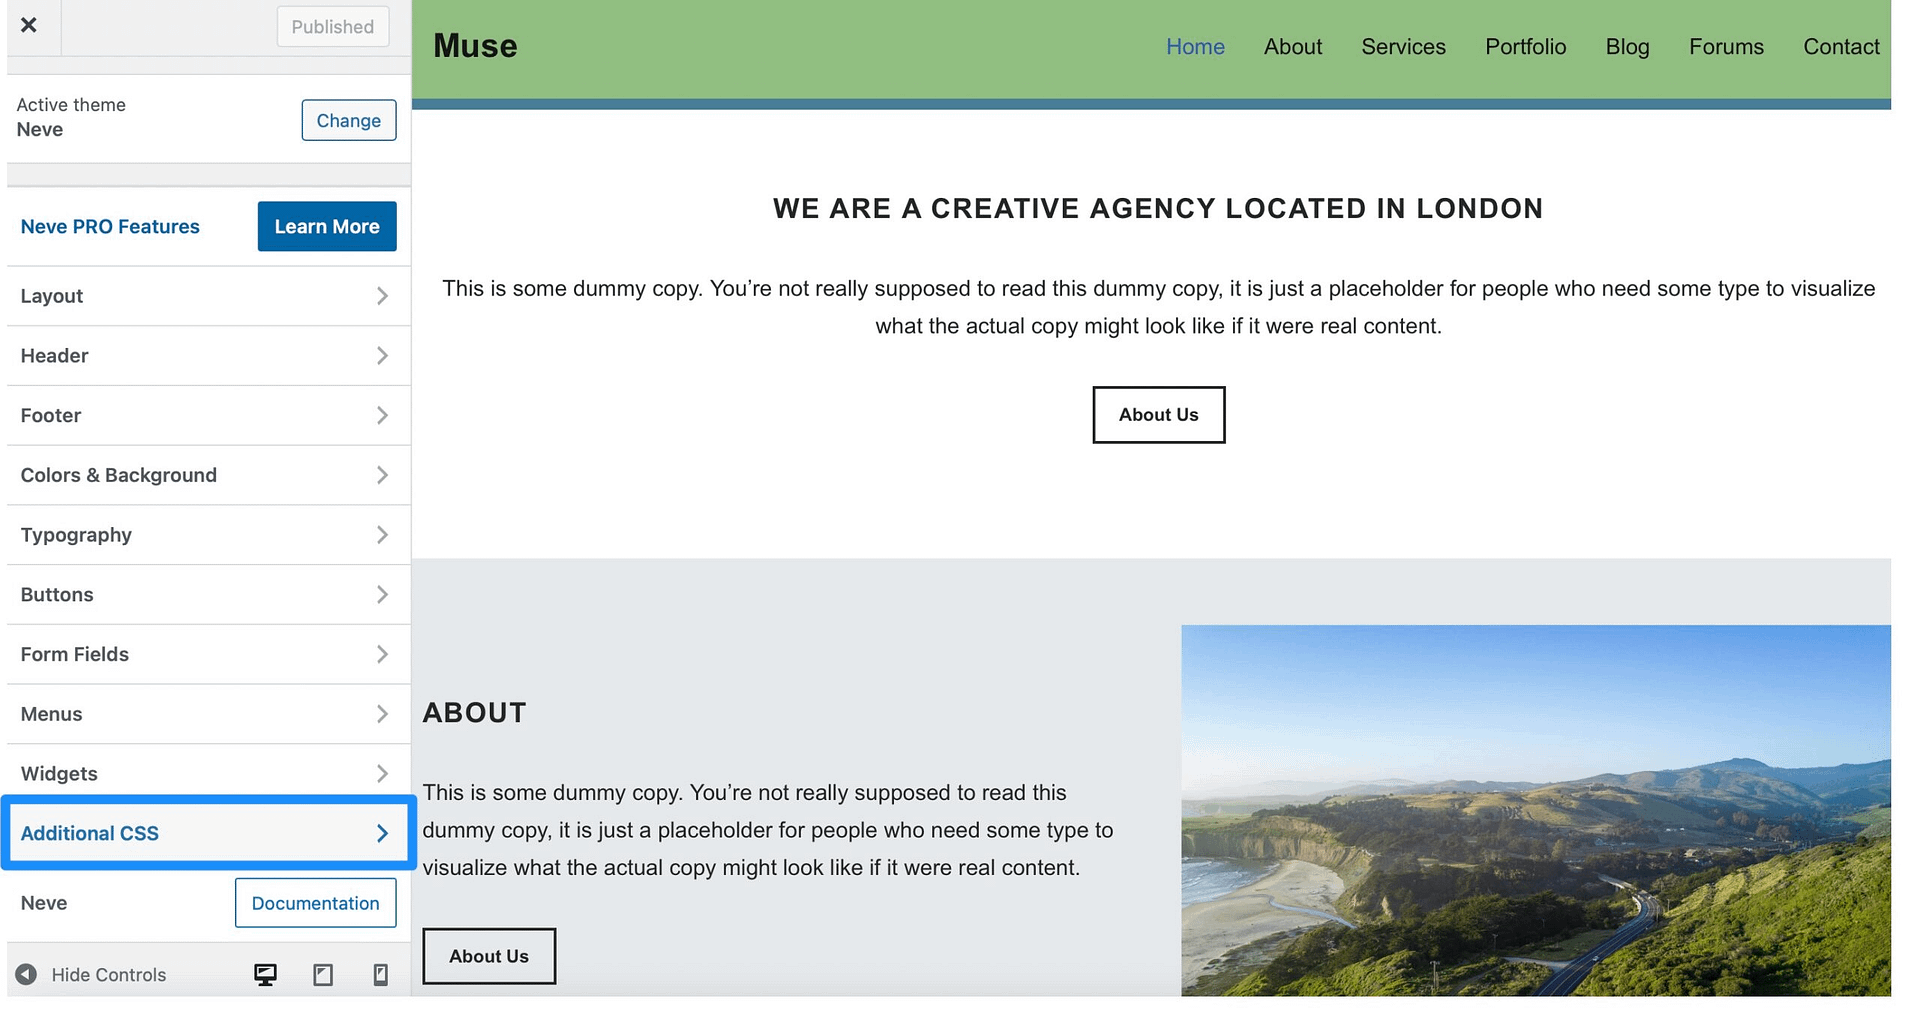
Enter the following code into the CSS box:
#site-navigation {
background:#00000;
height:60px;
z-index:170;
margin:0 auto;
border-bottom:1px solid #dadada;
width:100%;
position:fixed;
top:0;
left:0;
right:0;
text-align: center;
}
Code language: CSS (css)You’ll need to replace “#site-navigation” with your website header’s CSS class or ID. If you’re not sure how to find this, see the relevant instructions in method 1.
You can also change the header color by entering a different hex code after “background.” Plus, you can customize the height, width, and other display settings by adjusting the relevant parts of the code. Then, click on Publish to make your new header live.
4. Install a premium theme with a built-in WordPress sticky header
The final way to build a WordPress sticky header is to install a theme that has this functionality built-in. While this is the more expensive option, it enables you to add the feature without relying on plugins or using code. It’s relevant if you’re creating a new website and haven’t settled on a theme yet.
There are plenty of great themes that come with ready-made sticky menus (or that let you make your existing menu sticky). One example is Neve PRO.
Even with the free version of Neve, you can build custom headers and footers using an intuitive drag-and-drop editor. However, you’ll get even more settings with the premium theme, such as advanced styling options and new components. This way, you can build mobile headers, transparent headers, and sticky headers.
Once installed and activated, go to Appearance > Customize in your WordPress dashboard. Select the Header option.
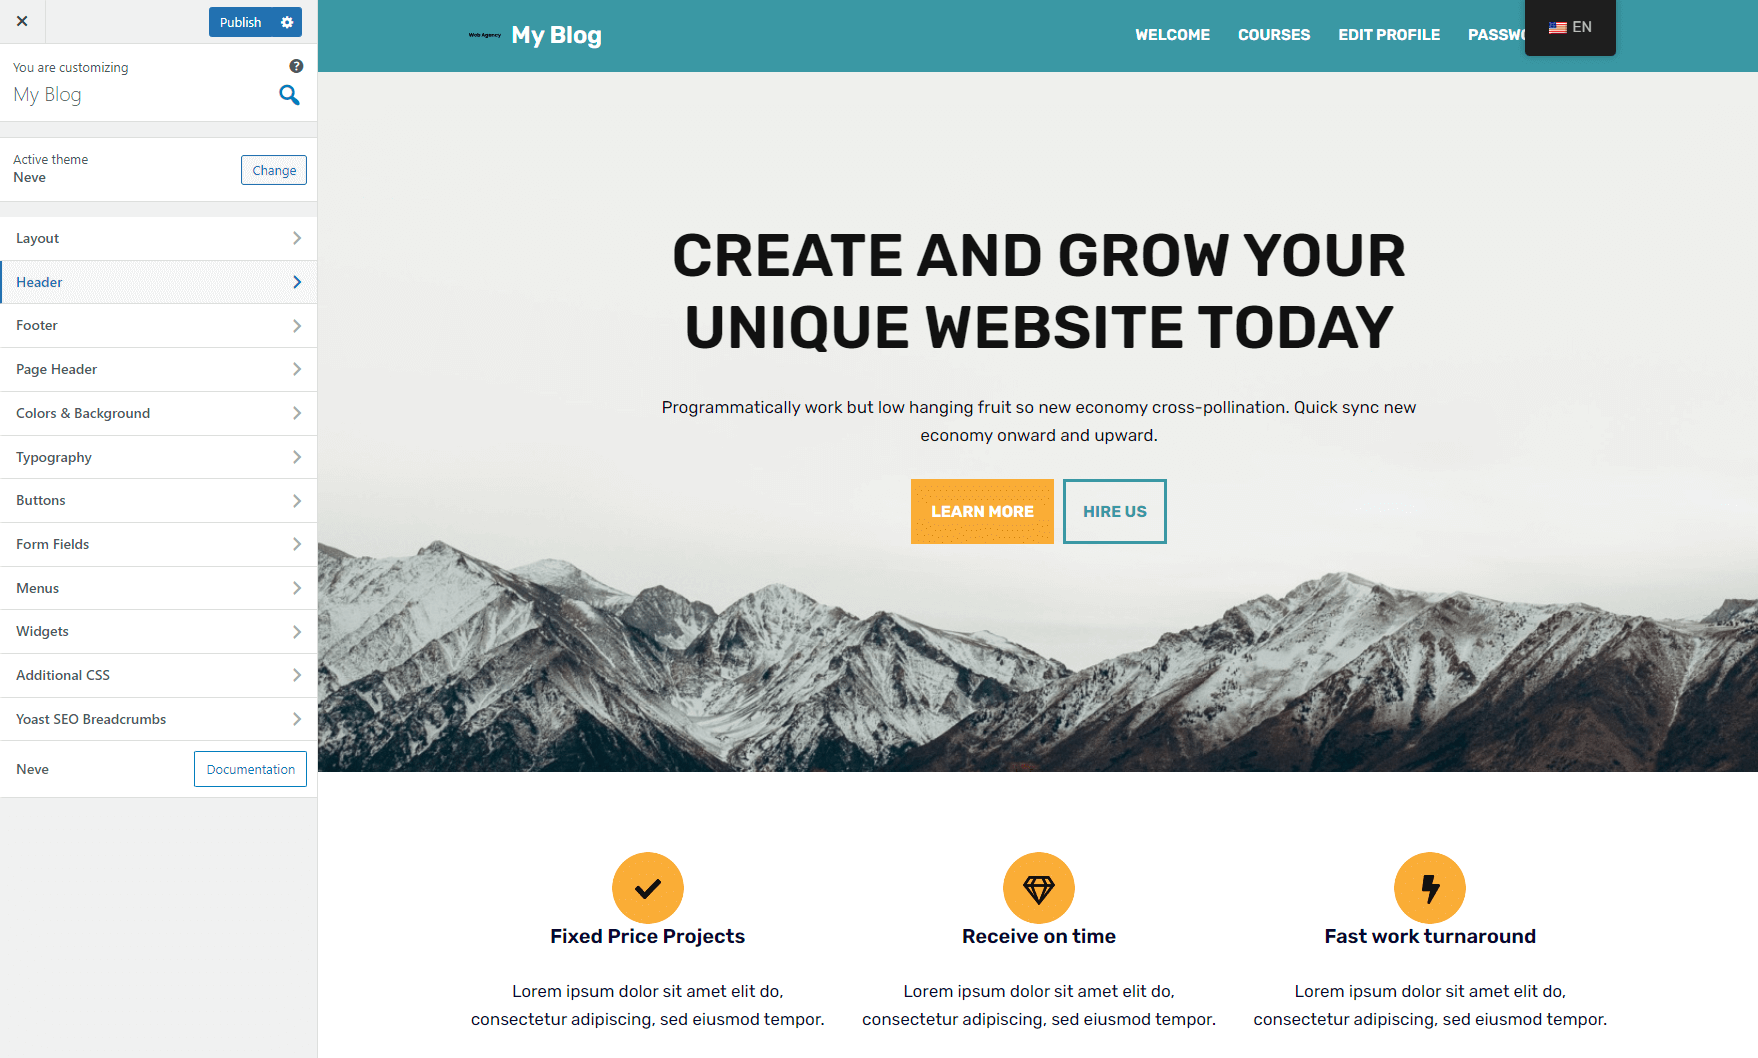
Neve Pro lets you set up multiple headers on your site and customize them. To make a header sticky, select it and choose the Stick to top option.
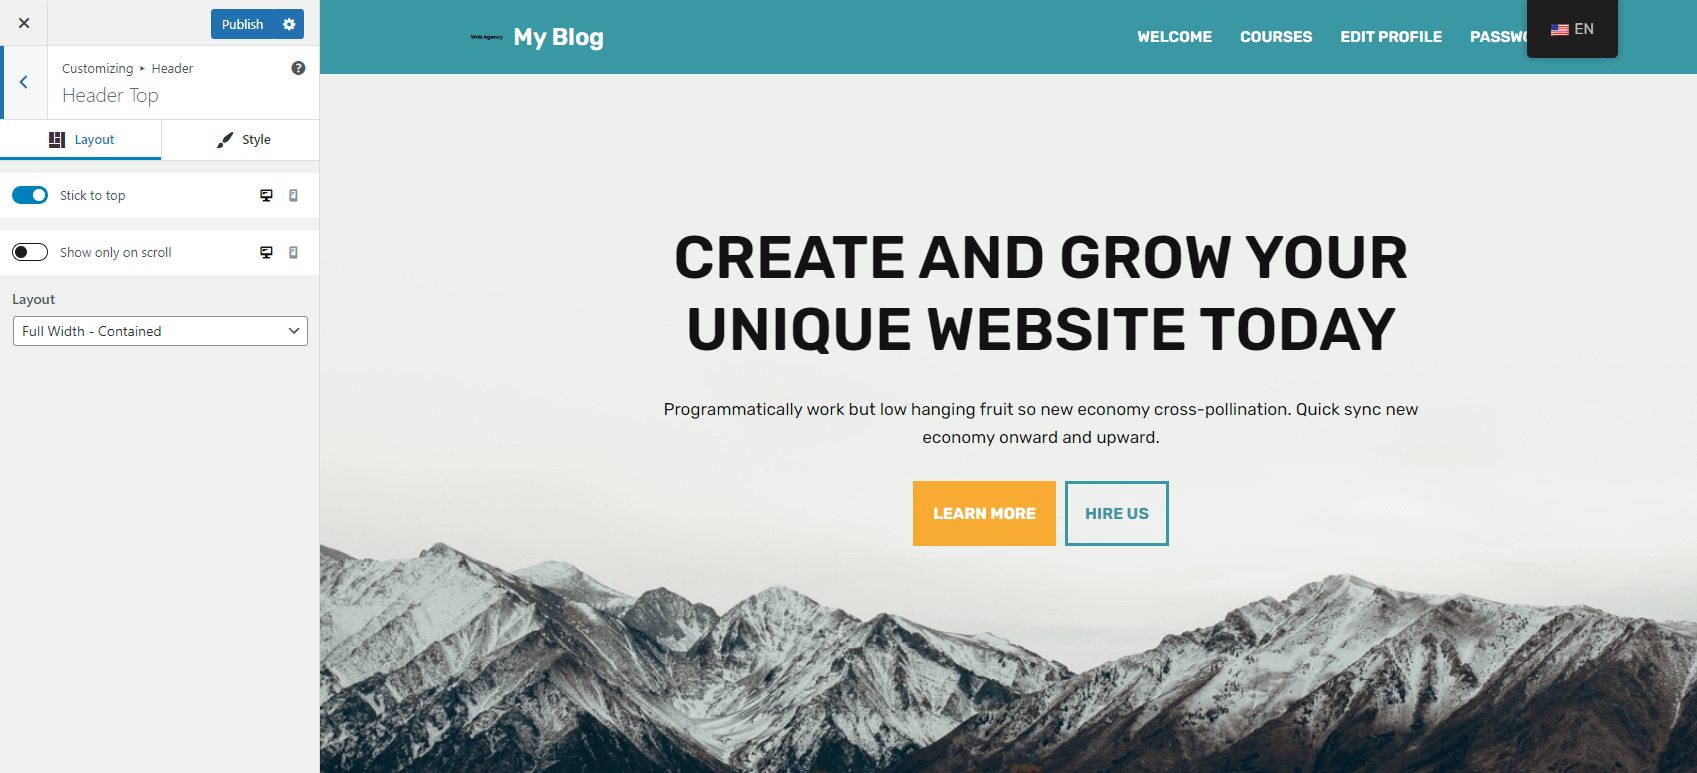
To the right of that option, determine whether you want the header to be sticky on desktop devices, mobile devices, or both. Just select the relevant icons.
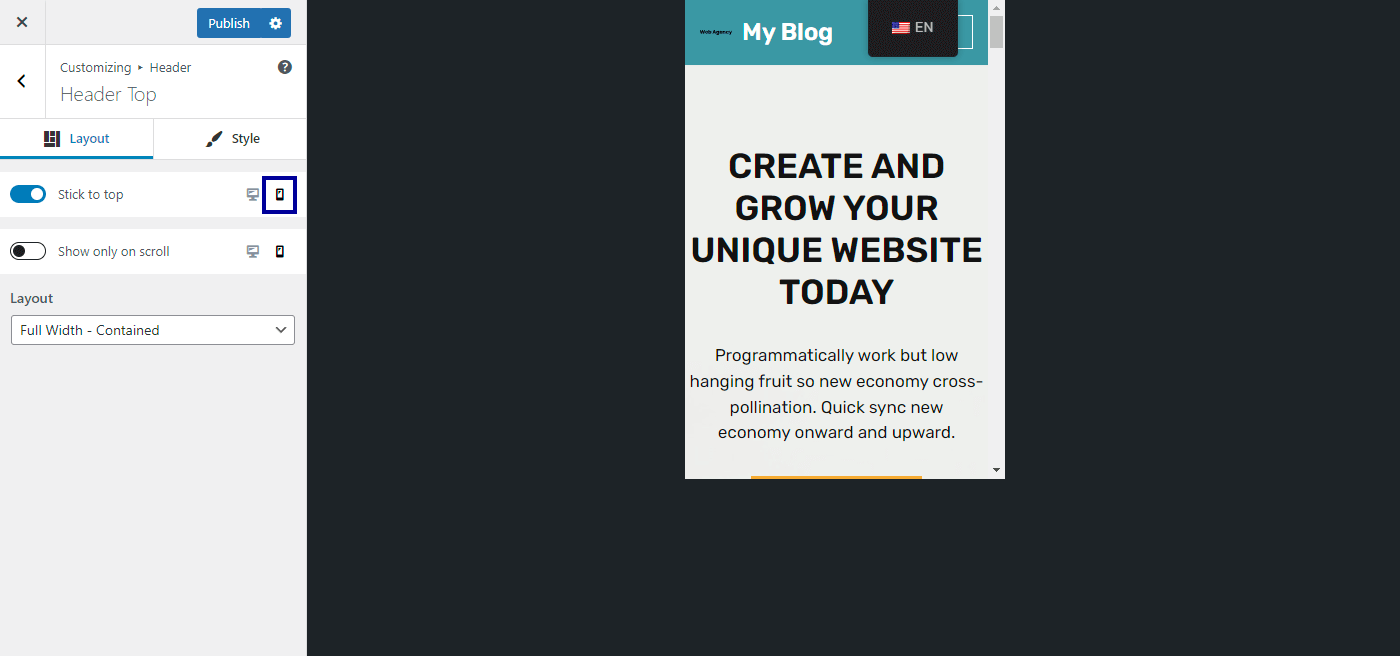
After that, hit Publish, or continue to customize your header using Neve Pro’s built-in tools and options.
Conclusion 🧐
A sticky header enables visitors to view and access menu items from any page on your website. Better yet, you can include elements like CTAs and your business logo to improve brand recognition and boost conversions.
👉 To recap, here are four ways to create a WordPress sticky header:
- Install a plugin like Sticky Menu & Sticky Header.
- Add a sticky header in the Full Site Editor (FSE), using a block theme like Neve FSE.
- Create a sticky header using custom CSS.
- Install a premium theme with a built-in sticky header, such as Neve PRO.
What type of WordPress sticky header are you building for your website? Let us know in the comments below!
