How to Create a WordPress Multilingual Site: Considerations + Tutorial
In this post, we’ll look at what a multilingual website is, and outline the differences between manual and automatic translations. 🧑💻 Then, we’ll show you how to create a WordPress multilingual website. Let’s get started!
📚 Table of contents:
What is a multilingual site?
A multilingual website is a website where content is available in different languages. It enables visitors to view the site in their preferred languages.
When you create a multilingual site, you’ll have to translate all the text within your pages, including web copy, image captions, metadata, and more. This may seem like hard work, but if you have a WordPress site, there are plugins you can use to simplify the process.
You have two options when it comes to creating a WordPress multilingual site: manual or automatic translation.
With manual translation, you’ll need to input the translated content into your site. This may involve hiring a professional translator or doing all the work yourself (if you’re fluent in multiple languages).
Thanks to AI tools like ChatGPT, translating content has become much easier. You can simply enter your text into the program, and ask ChatGPT to translate it into your chosen language:
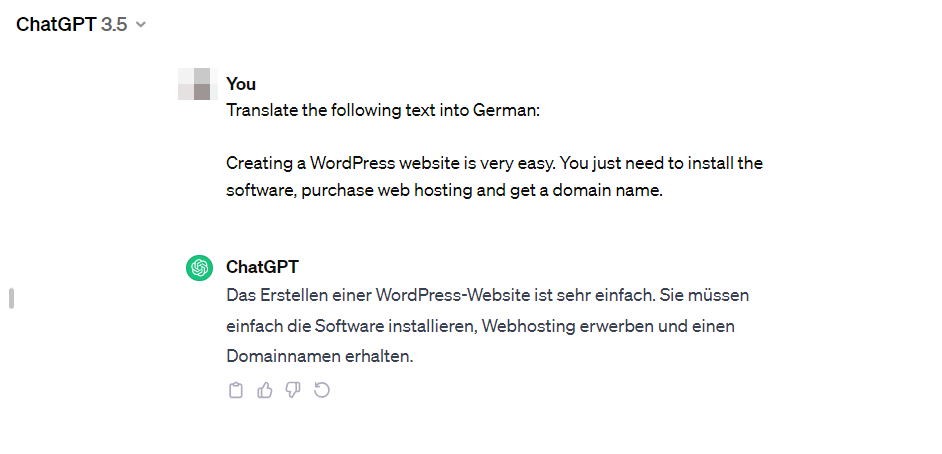
Of course, you’ll still need to copy and paste the translations into your site. Depending on the number of pages you have, this process can feel a little overwhelming.
If you opt for automatic translation, your website will be translated by a program like Google Translate. This will make the process much quicker and easier.
🔠 There are two main things to consider when choosing between manual and automatic translations:
- Accuracy – As you might already know, translation programs do not always provide accurate results. A human translator is more aware of linguistic nuances and variations, and can therefore provide more readable content.
- Budget – Hiring a professional translator can be quite costly, especially if you want to translate your site into a less-spoken language. Meanwhile, translation programs can be more affordable as you usually pay for the number of words you need to translate.
How to create a WordPress multilingual website with TranslatePress
Whether you want to translate your website manually or use a program, you’ll still have to install a translation plugin.
For this tutorial, we’ll be using TranslatePress. This plugin enables you to easily create a WordPress multilingual site.
TranslatePress uses a visual translation interface, so you can see your changes in real time. It supports both manual and automatic translation (through Google Translate or DeepL). It also works with WooCommerce, so you can translate your product pages and checkout process, too.
TranslatePress has a free and premium version. Plans for the premium plugin start at 7.99 EUR per month.
If you want to connect the plugin to Google Translate, you’ll need to get an API key. Google Translate lets you translate 500,000 characters per month for free (~100,000 words).
When you exceed that number, charges start at $20 per million characters. There are no monthly plans and you’re only billed based on your actual usage. TranslatePress also includes features to help you control your budget (or make sure you stay within the free plan).
In this tutorial, we’ll be creating a WordPress multilingual website with the free version of TranslatePress and manual translation.
👉 Here’s how it works:
Step 1: Install TranslatePress 🖱️
Let’s start by installing TranslatePress. In your WordPress dashboard, navigate to Plugins → Add New Plugin. Use the search bar to find the tool, then click on Install Now, followed by Activate:
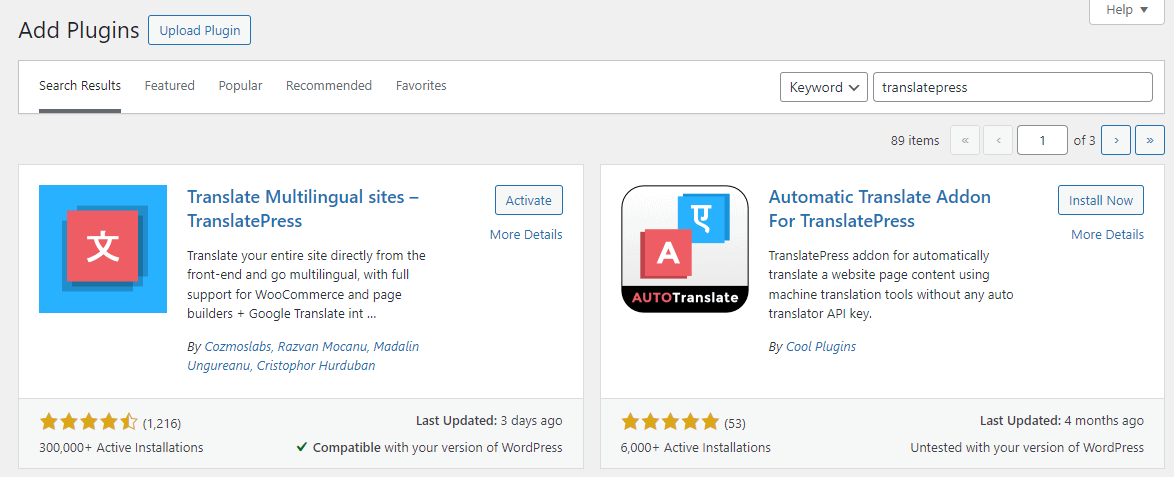
Once you’ve activated the plugin, you’ll be directed to its settings page. Alternatively, you can access the plugin by clicking on Settings → TranslatePress in your dashboard.
Step 2: Choose your translation language 💬
Next, you can choose the language/s you want to translate your site into. With the free version, you can only select one new language (besides the default one):
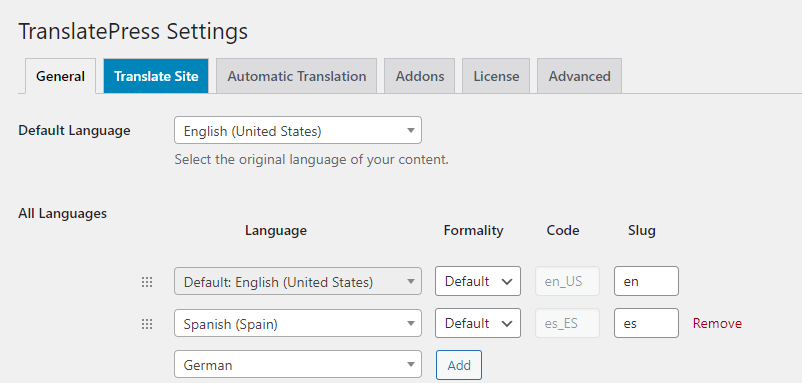
If you want to make your website available in more languages, you’ll need to upgrade to the premium version of TranslatePress.
In addition to choosing the language itself, you can also select the locale. For example, when translating your site into Spanish, you can choose between Spain, Mexico, or other Spanish-speaking countries as the locale.
Once you’ve selected your languages, click on Save Changes.
Step 3: Enable automatic translation (optional) ⚙️
If you’re opting for automatic translation, now’s the time to activate it. Go to the Automatic Translation tab and use the dropdown menu to enable this feature:

Then, select the translation program you want to use. For Google Translate, you’ll have to enter the API key (which you can get from your Google Cloud account). TranslatePress has detailed instructions for setting it up.

If you want to use DeepL, you’ll have to upgrade to TranslatePress Pro and install the dedicated add-on.
You can also configure a few settings for the automatic translation. For example, you might want it to translate the slugs (URLs) as well (available only with the premium plugin), or set a limited number of characters to be translated per day:
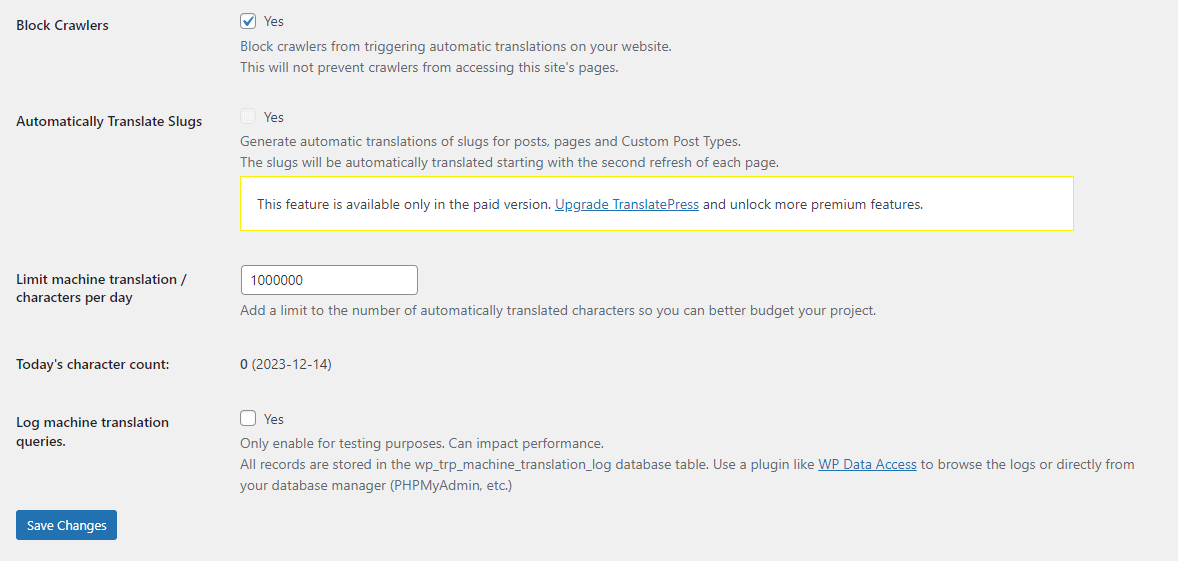
Remember to hit Save Changes when you’re done.
Step 4: Configure your language switcher 🕹️
Now, let’s configure the language switcher. These are the flags or language codes that you normally see at the top of a page that’s available in different languages:
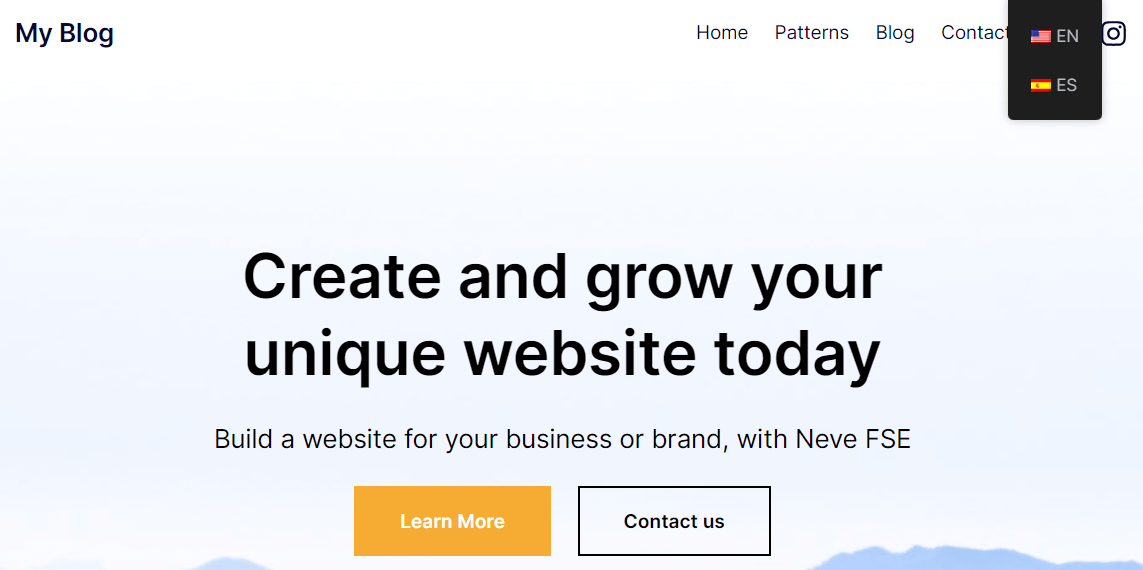
If visitors want to access the website in a particular language, they’ll just need to click on the corresponding flag or code.
By default, TranslatePress adds a floating language switcher to the bottom-right corner of your site. However, you can change how your site’s language switcher works, such as placing it in your header/navigation menu instead.
Go to Settings → TranslatePress and select the General tab. Then, scroll down to the Language Switcher section:
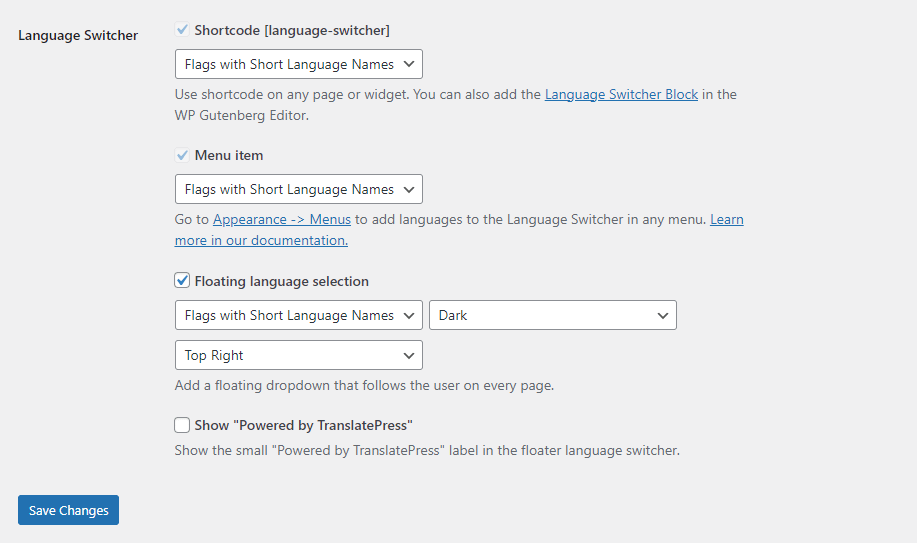
As you can see, you have several options. For example, you can display the full language names or the short versions, the flags only, or the flags with the full or short names.
You can also select the location of the language switcher.
TranslatePress also lets you choose from a dark or light background for the language switcher.
When you’re ready, click on Save Changes. If you want to add the switcher to a different place on your site, like a post or sidebar, you can insert it using the provided shortcode:
[language-switcher]
There’s also a TranslatePress Language Switcher block, which you can access from the Block Editor:
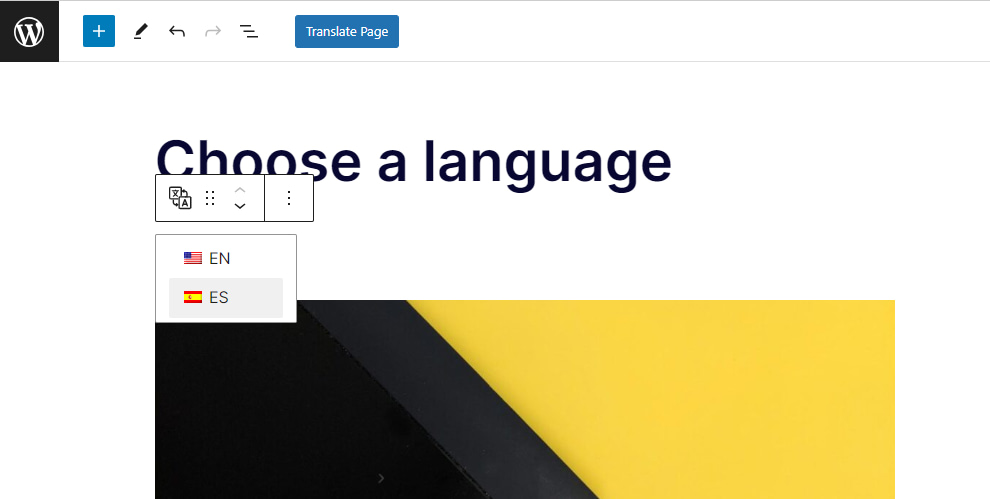
Once you save your changes, you should be able to see the language switcher on the live website.
Step 5: Translate your content 📝
Now comes the fun part: translating the content! TranslatePress makes this process super easy, enabling you to translate your site on the frontend and view the results in real time.
Visit any page on your site as a frontend user. In the admin menu on the top, you should see an option that says Translate Page:
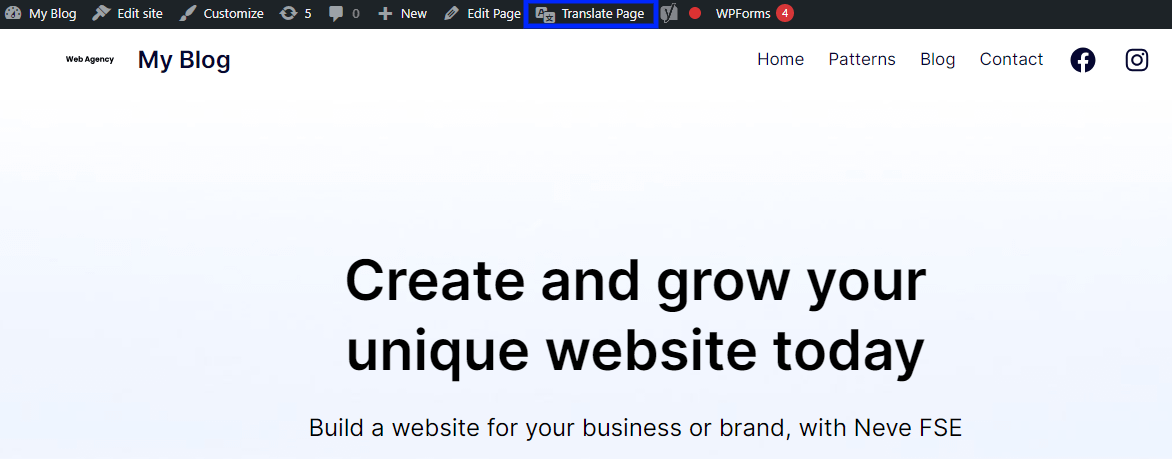
Go ahead and click on it. This will open the page in the translation editor:
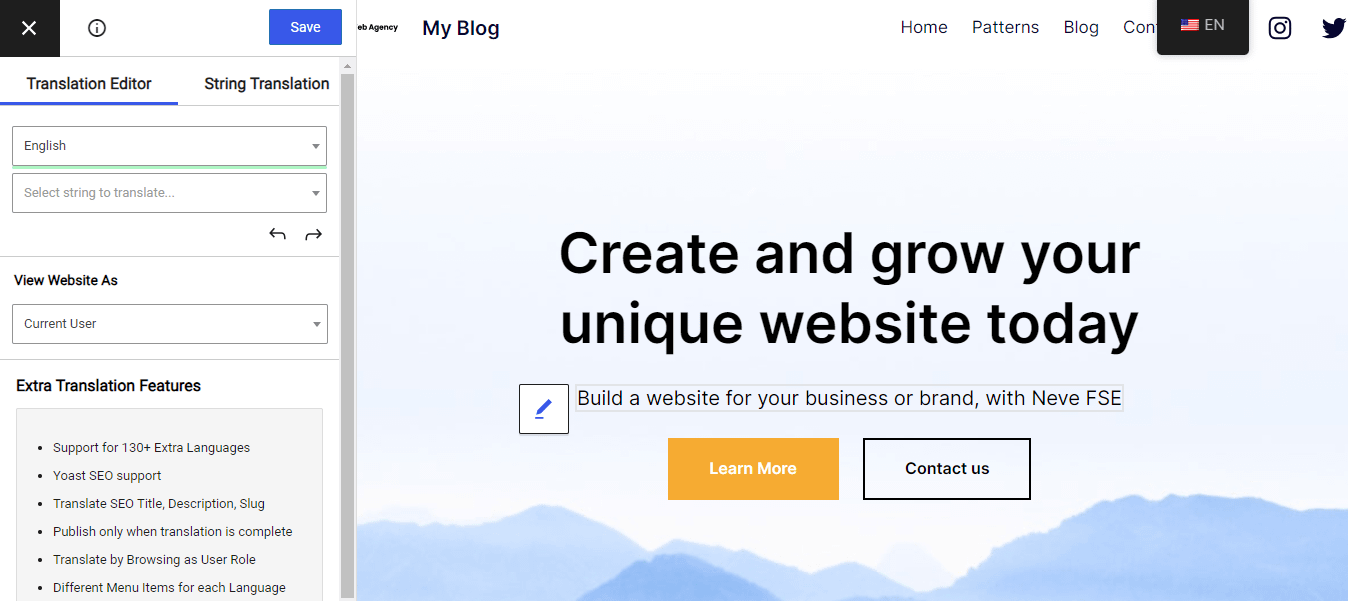
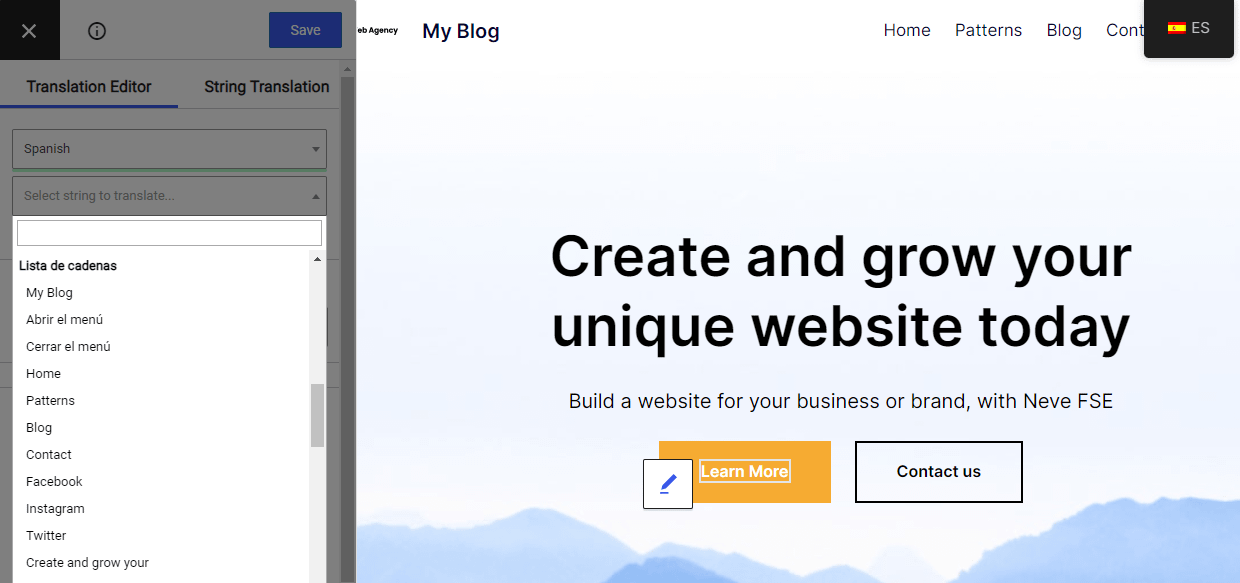
From the dropdown menu on the left, choose the language you want to translate your page into. Then, select the element (or “string”) you want to translate. You can either select it on the page and click on the Translate icon, or use the available dropdown menu to find the element:
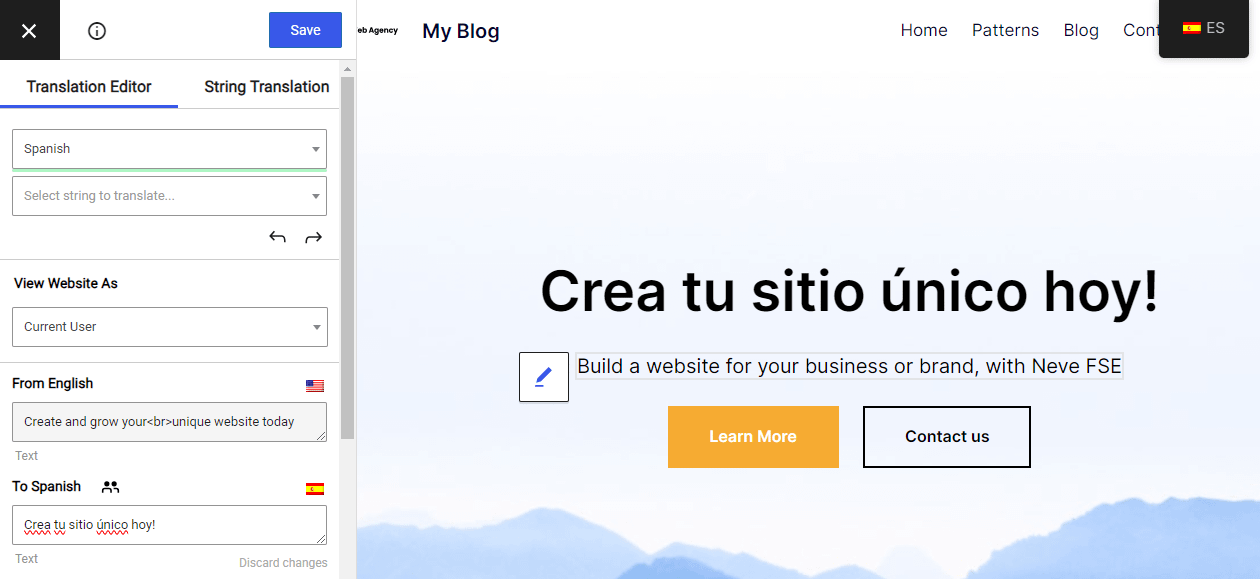
If you’re doing manual translations, you’ll need to enter the translation into the corresponding field. Once you click on the Save button, you’ll see the translated element on the page:
If you set up Google Translate, TranslatePress will automatically pre-fill the translations with those from Google Translate.
However, if you want to use something like ChatGPT, you’ll still have to copy and paste the translations into TranslatePress manually.
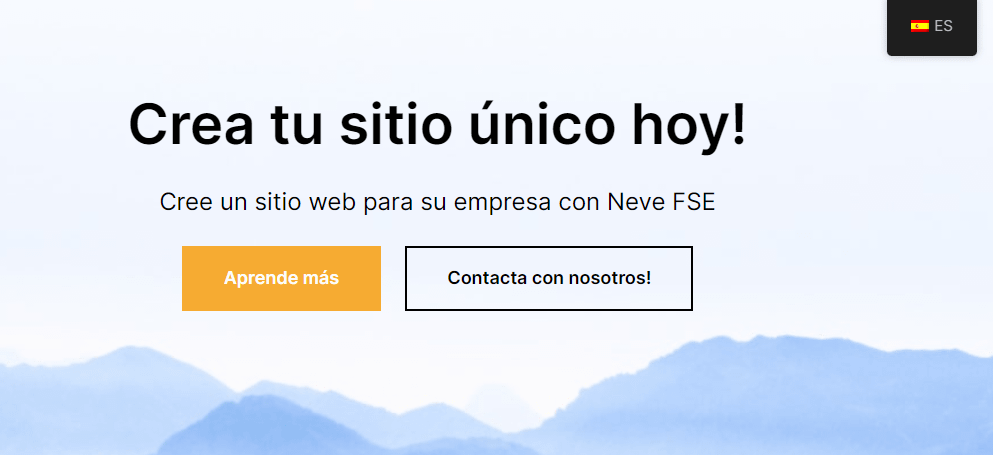
When you’ve translated the entire page, you can visit it on the frontend and select the language to see the result:
To translate a post, open it in the Block Editor and click on the Translate Page button at the top:
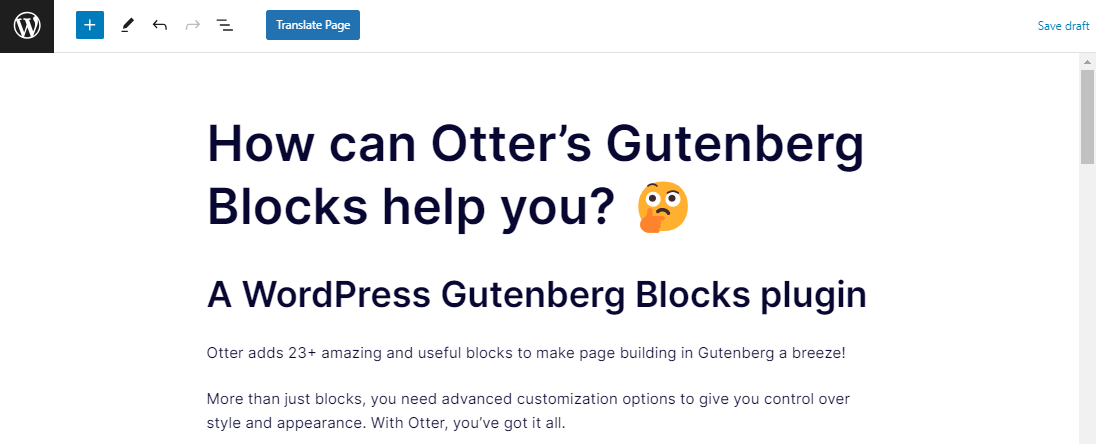
This will open it in the translation editor:
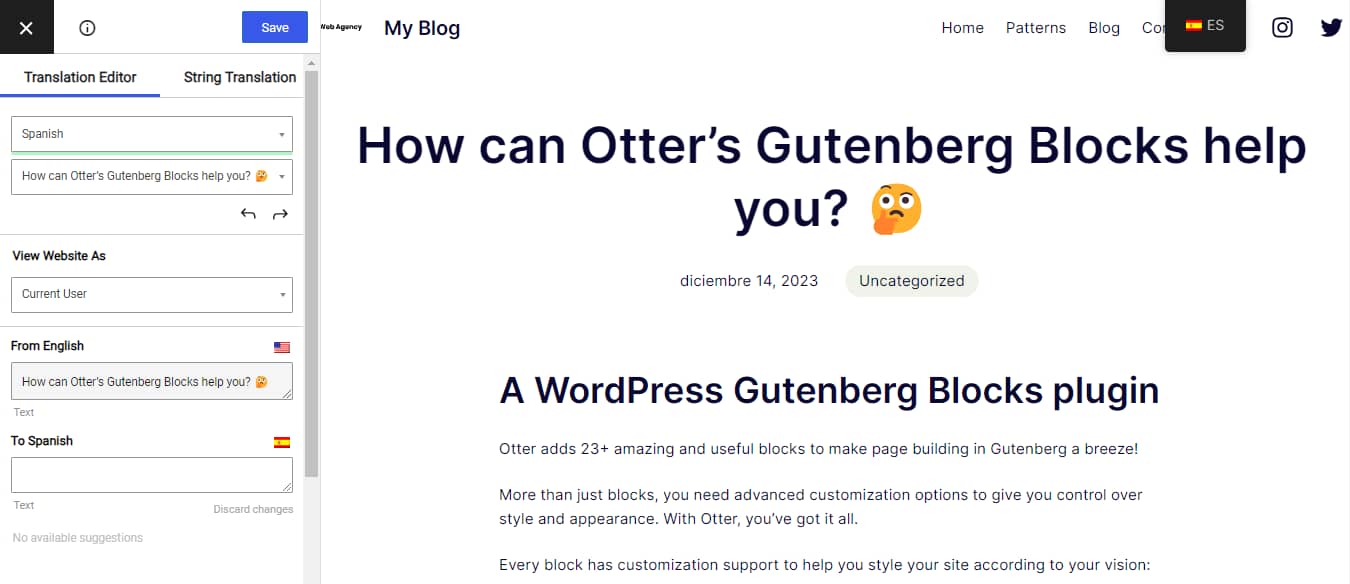
Now, you can follow the process outlined above to translate the entire post. This includes any image captions and post details like categories and publication dates.
If you have TranslatePress Pro, you’ll also be able to translate SEO elements like titles, meta descriptions, and slugs. You’ll just need to activate the SEO Pack add-on:

Always remember to hit Save every time you translate an element!
Create your WordPress multilingual website today ⏰
Creating a WordPress multilingual website can be done manually or automatically. You might hire a professional translator to provide accurate translations, but this can be a little expensive if you have a large website. Alternatively, you might use a translation program like Google Translate to save money, but the results may not be as accurate.
To recap, here’s how to make your website available in multiple languages:
- Install TranslatePress 🖱️
- Choose the languages you want to translate your site into 💬
- Enable automatic translation (optional) using Google Translate or DeepL ⚙️
- Configure your language switcher 🕹️
- Translate your content using the visual editor 📝
👉 To see some other options, you can also check out our detailed comparison of the best WordPress translation plugins.
Do you have any questions about how to create a WordPress multilingual website? Let us know in the comments section below!


